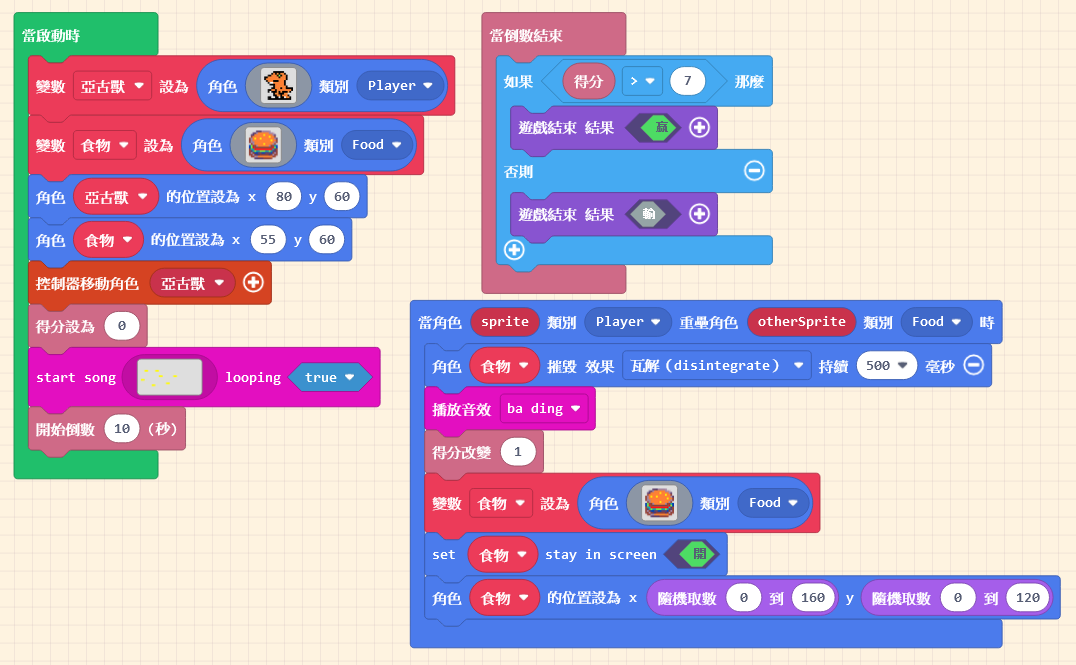
In the previous unit, we completed a game where the player must eat a specific number of burgers within a time limit to win.
Actually, we can add more elements to enrich the game content. For instance, we can add a “charming villain” (an enemy)😈; if the player accidentally touches them, they lose health.💔
Of course, this villain shouldn’t just stand still; they need to behave dynamically. This is the focus of this unit: “Bringing Sprites to Life,” making the characters on screen flexible and alive.
9.1 Making Sprites Move Automatically – Adding an Enemy
First, open the game designed in the previous unit. We are going to add an “Enemy.”
You should be familiar with adding sprites. Click on “Sprites” in the Block Toolbox, use the create sprite block, and place it inside “on start.”
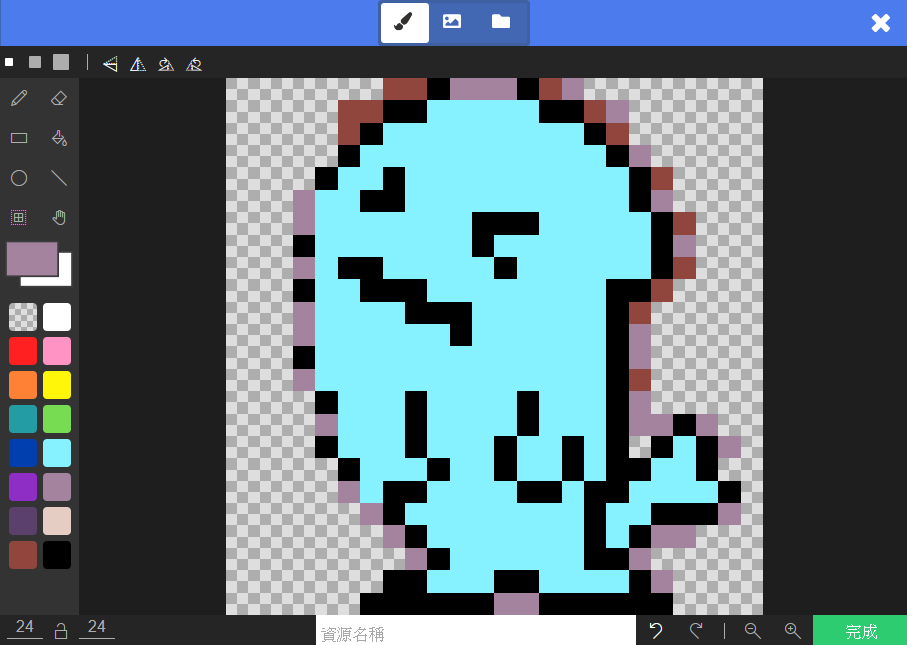
You can design the sprite’s pattern yourself, just like the editor did, or use a pattern from the Gallery. Since it’s a villain, remember to make it look fierce!👹👹👹
After designing the pattern, besides remembering to “Rename the Variable,” please set the “Kind” to “Enemy.”

9.2 Making Sprites Move Automatically – Adding Life (Health) Function
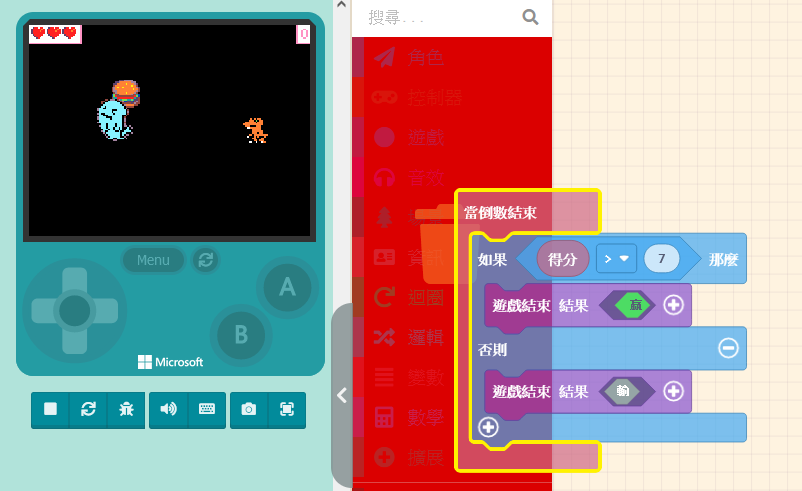
We want to set a rule: during the game, if the controlled sprite touches the enemy, health will be deducted. Since our current game doesn’t have a health design, we need to add this feature. Click on “Info” in the Block Toolbox. You can see blocks related to “Life” here.
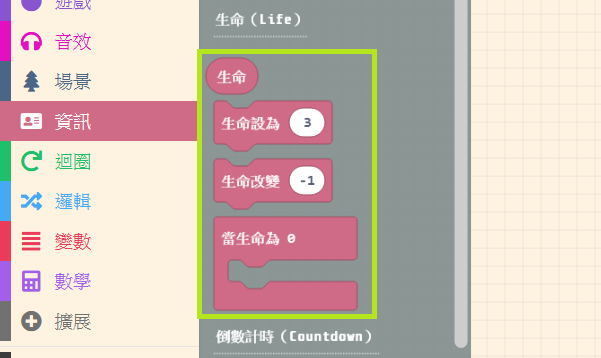
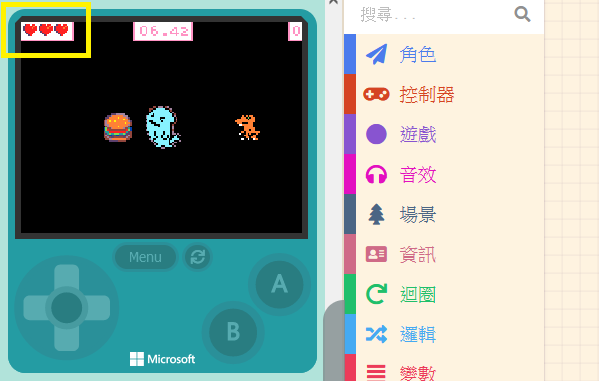
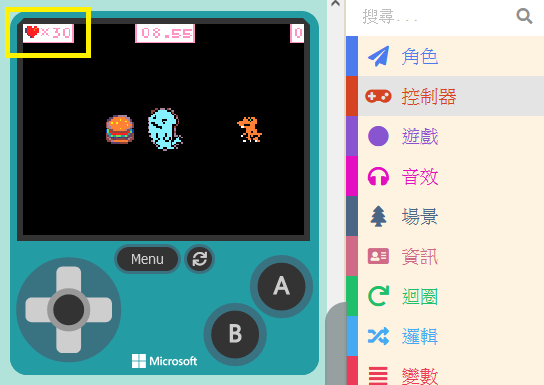
Just like the “Score” blocks in the previous unit, simply drag the Life-related blocks into the Workspace. After assembling the code correctly, a heart icon will appear in the top-left corner of the Game Simulator.
Now, drag the “set life to ( 3 )” block into “on start.” It can be placed anywhere, as long as it is before the “start countdown ( 10 ) seconds” block.
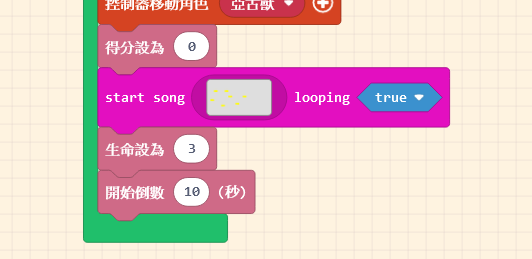
You can set the number of lives yourself. You can even set it to 100. Note that if the number exceeds 4 hearts, the display style will automatically adjust to avoid blocking the screen.
9.3 Making Sprites Move Automatically – Reducing Life
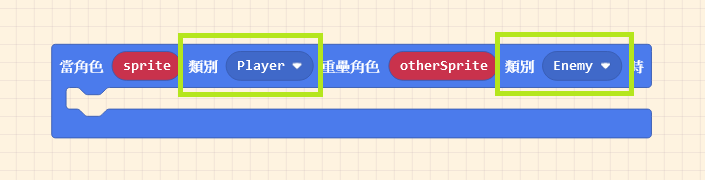
We taught the method for triggering events when sprites touch in Unit 6: the “Overlaps” block in the “Sprites” list. The difference this time is that we need to set the other Kind to “Enemy.”
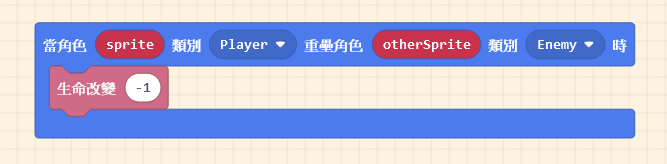
When the player touches the villain, we will change the initial life value. Click on “Info” in the Block Toolbox and find “change life by ( -1 ).” The usage is the same as “change score.”
The “on overlaps” block functions such that it executes continuously as long as the sprites are overlapping. Because the program runs very fast, it might happen that before you can separate the sprites, your health is drained instantly. Therefore, we need to pause the program briefly upon contact (creating a temporary invincibility or cooldown period).
Click on “Loops” in the Block Toolbox to find the “pause ( 100 ) ms” block.

Drag this block out and place it below “change life by ( -1 ).” This prevents instant death from rapid health deduction!

9.4 Making Sprites Move Automatically – Enemy Patterns
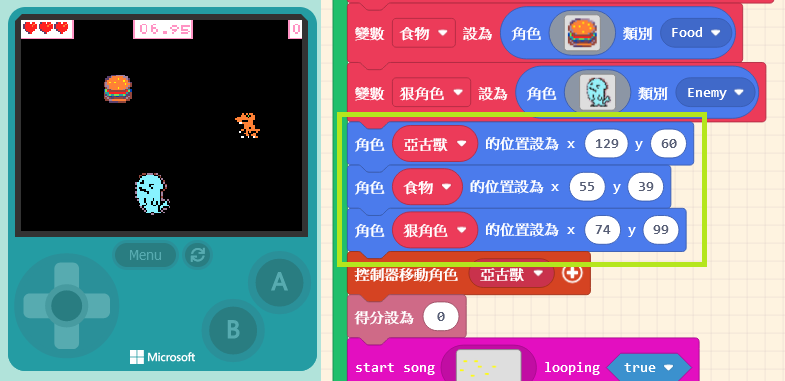
Before making the villain move, we need to adjust everyone’s initial positions to avoid losing health the moment the game starts.
Common enemy behavior patterns fall into two types: “Chasing the Player” and “Teleporting.” Let’s introduce them in order.
9.4.1 Chasing the Player
Before we explain, you might have thought: “Since it needs to chase the player, do we need to know the ‘Player’s coordinates’ and the ‘Enemy’s coordinates,’ calculate the angle of the shortest distance, and then pursue?”
No, no, no. While theoretically correct, practical operation doesn’t need to be that complex. MakeCode Arcade has already figured it out for us.
Let’s click on “Sprites.” Inside the “Physics” section of the list, you can find the “set [myEnemy] follow [mySprite]” block.

Drag this block into “on start.” Click the “+” sign at the end of the block to see the “Speed” setting field. The default speed of 100 makes the enemy as fast as the player—playing at this speed is extremely difficult! You’ll be caught in the blink of an eye. So, please change it to a lower number.
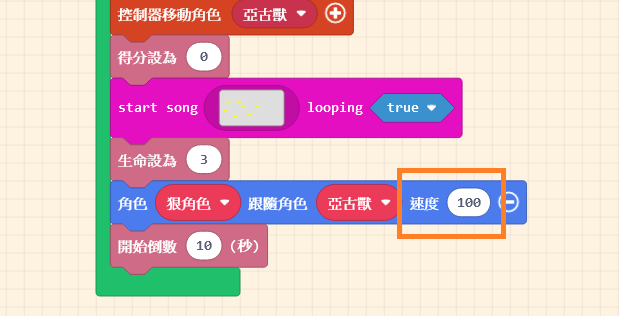
After setting it, test it with the Game Simulator and repeatedly adjust it to a speed you feel is appropriate.
9.4.2 Teleporting
Another method is to make the enemy instantly “Change Position” at a “Fixed Frequency.” For example, setting the enemy to change position every two seconds creates a thrill when the enemy suddenly appears in front of you during gameplay.
We learned how to randomly change positions in previous units. The key is: How do we automatically change the position after a specific interval?
We can use the “on game update every ( 500 ) ms” block found in the “Game” category.
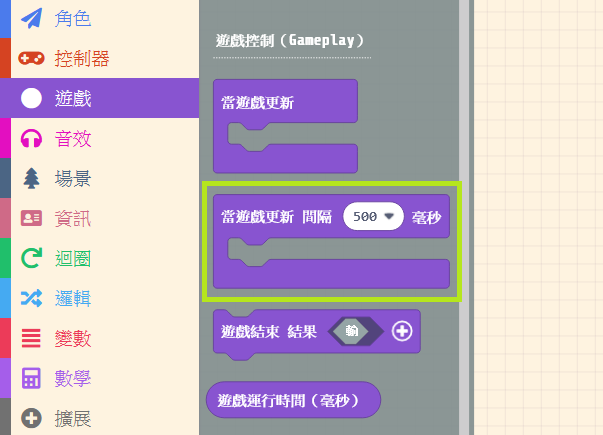
When we set the “Interval,” this block will continuously run the code inside it according to that interval. We want to change the enemy’s position every 2 seconds, so enter 2000 (since the unit is milliseconds) or select 2 seconds from the dropdown menu.

Finally, place the “Random Position” method inside this block. Remember to select the Enemy’s variable name.

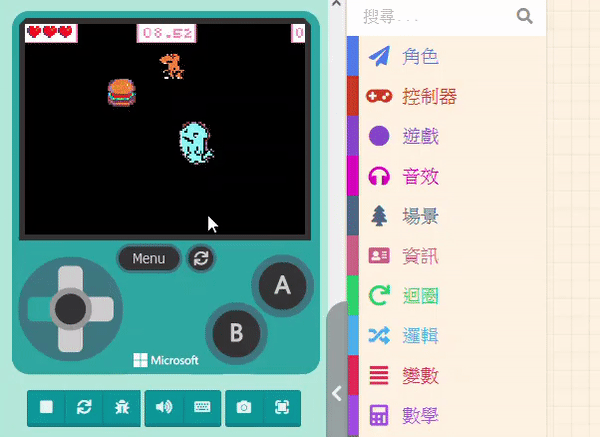
Once finished, try playing it in the Game Simulator.

In this unit, we learned about “Life (Health)” and “Animating Sprites.” In addition to the original tension of the time limit, the addition of the villain adds a lot of excitement and fun to the process. Currently, the gameplay mainly involves using the joystick to dodge.
Next, we will add the ability for the character to attack, just like the fighter jet in the “Space Destroyer” example, which can fire beams to destroy meteors.