We are going to add conditions to determine victory or defeat, transforming the simple “Orange Dinosaur eats Burger” interaction into an exciting mini-game. For example, we can add a “Scoring Mechanism” where eating a burger adds a point, and the eaten burger “Randomly” respawns elsewhere. Or, we could add “bad food” that gives the dinosaur a stomach ache. As long as you have an idea, you can add it to your game to make it richer.
Since this continues from the previous unit, you need to have “Two Sprites” prepared: one controlled by the player, and another to be eaten or destroyed. If you have been following this tutorial series step-by-step, you are already prepared!
8.1 Learning to Calculate Scores
First, open your project from the previous unit. You should have two sprites, and when they overlap, the non-player sprite is destroyed.

Taking the characters in the image as an example, our idea is: when the Burger is “destroyed“, we “gain points“. In MakeCode Arcade, a group of blocks is dedicated to handling this information: the “Info” category in the Block Toolbox.
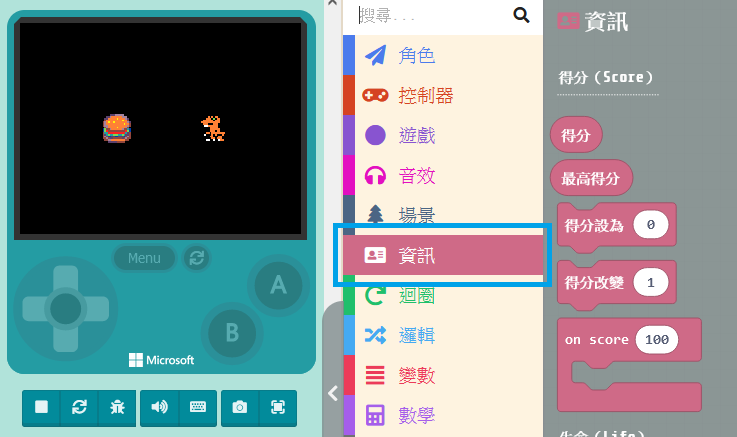
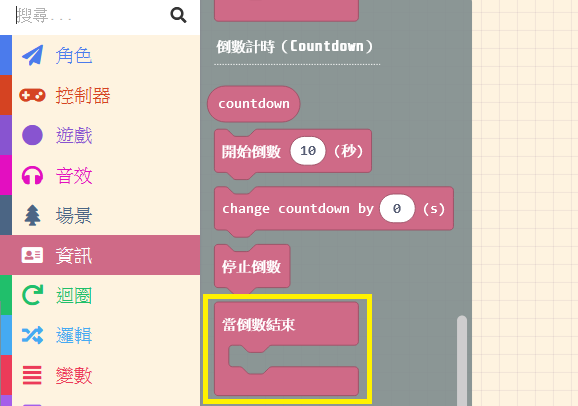
The “Info” category contains blocks like “Score“, “Life“, and “Countdown“, which we will use in order.
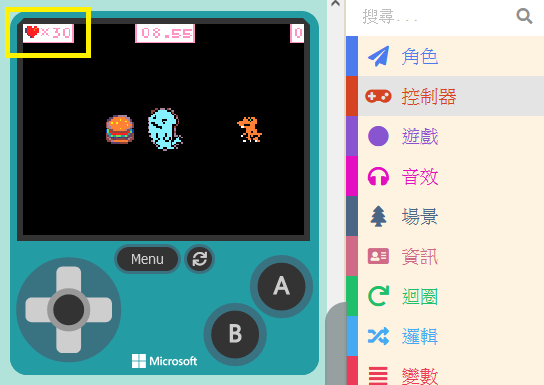
When we drag score-related blocks into the Workspace and assemble the code correctly, a score area will appear in the top-right corner of the Game Simulator.

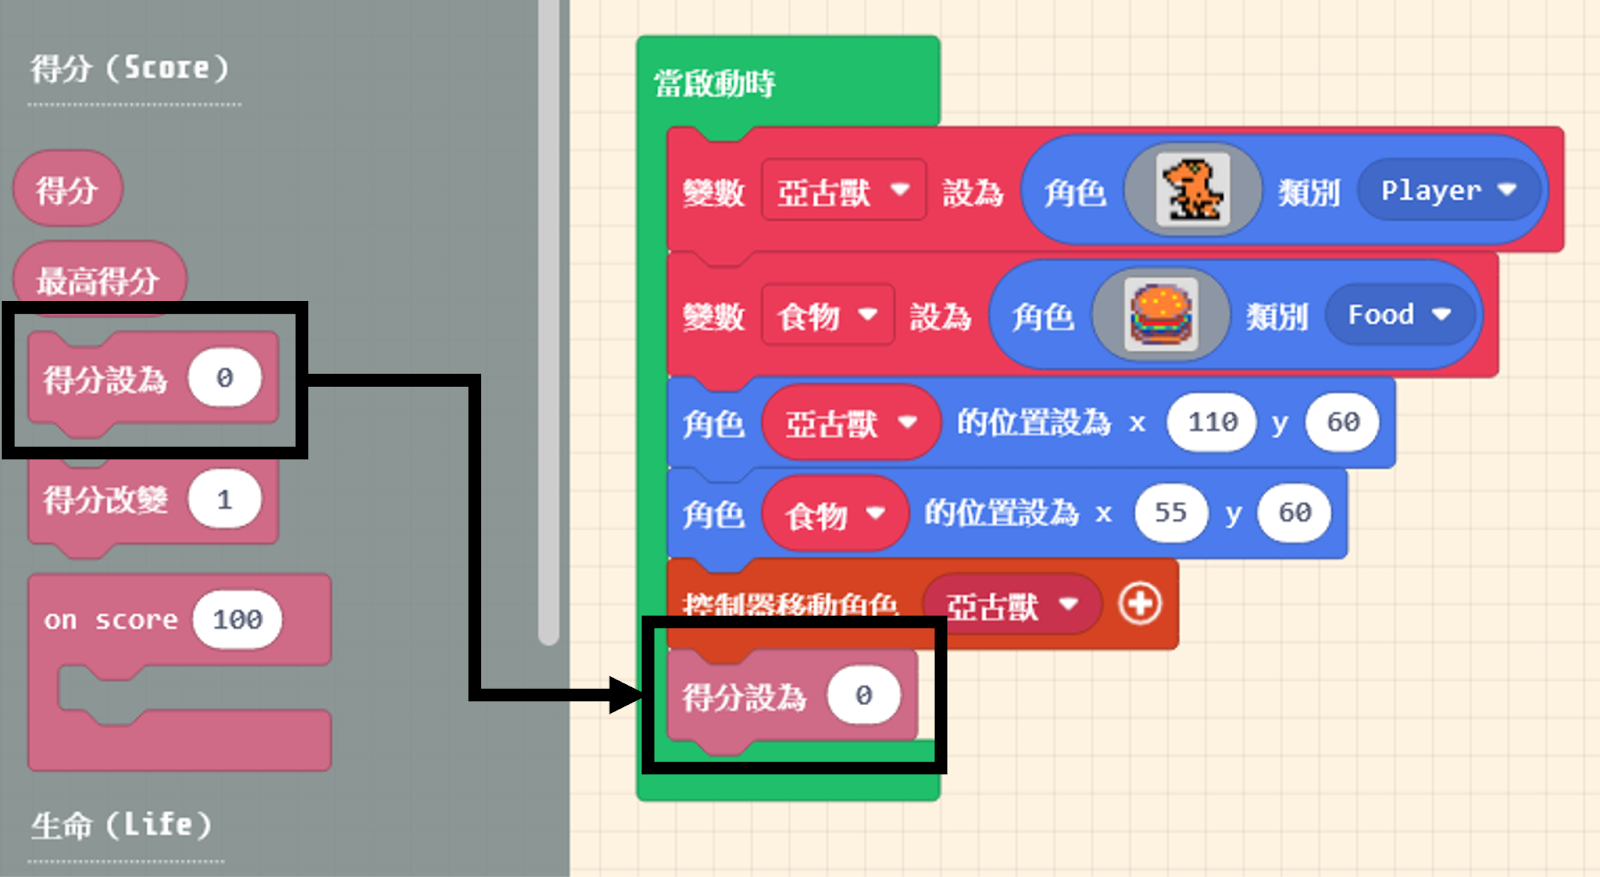
Now, let’s drag the “set score to ( 0 )” block and place it inside the “on start” block (it can be placed anywhere inside). Placing it in “on start” ensures the score resets to zero when the game restarts.
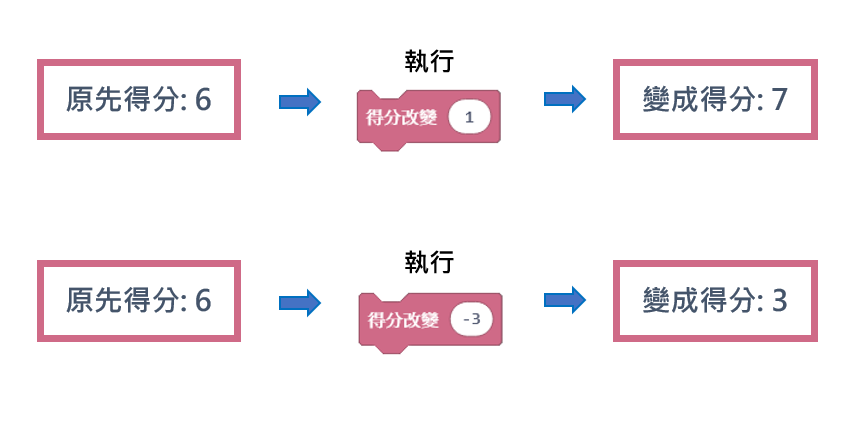
Next, we need a block to help us adjust the score. Also found in “Info,” drag out the “change score by ( 1 )” block.

The “1” in “change score by ( 1 )” means adding 1 to the current score. If you enter a negative number, it will subtract from the score, as shown below:
We can add this block to the “code that runs after the burger is eaten.” This way, when the Orange Dinosaur overlaps with the Burger, besides destroying the Burger, we also gain 1 point.

Once finished, run it in the Game Simulator and pay attention to whether the score increases!
8.2 Understanding Random Generation
Since the “Burger” is gone after being eaten, we need it to reappear. The method is simple: just create another burger. Besides setting its position, remember to set its “Kind” correctly so it meets the “Overlap Conditions.”

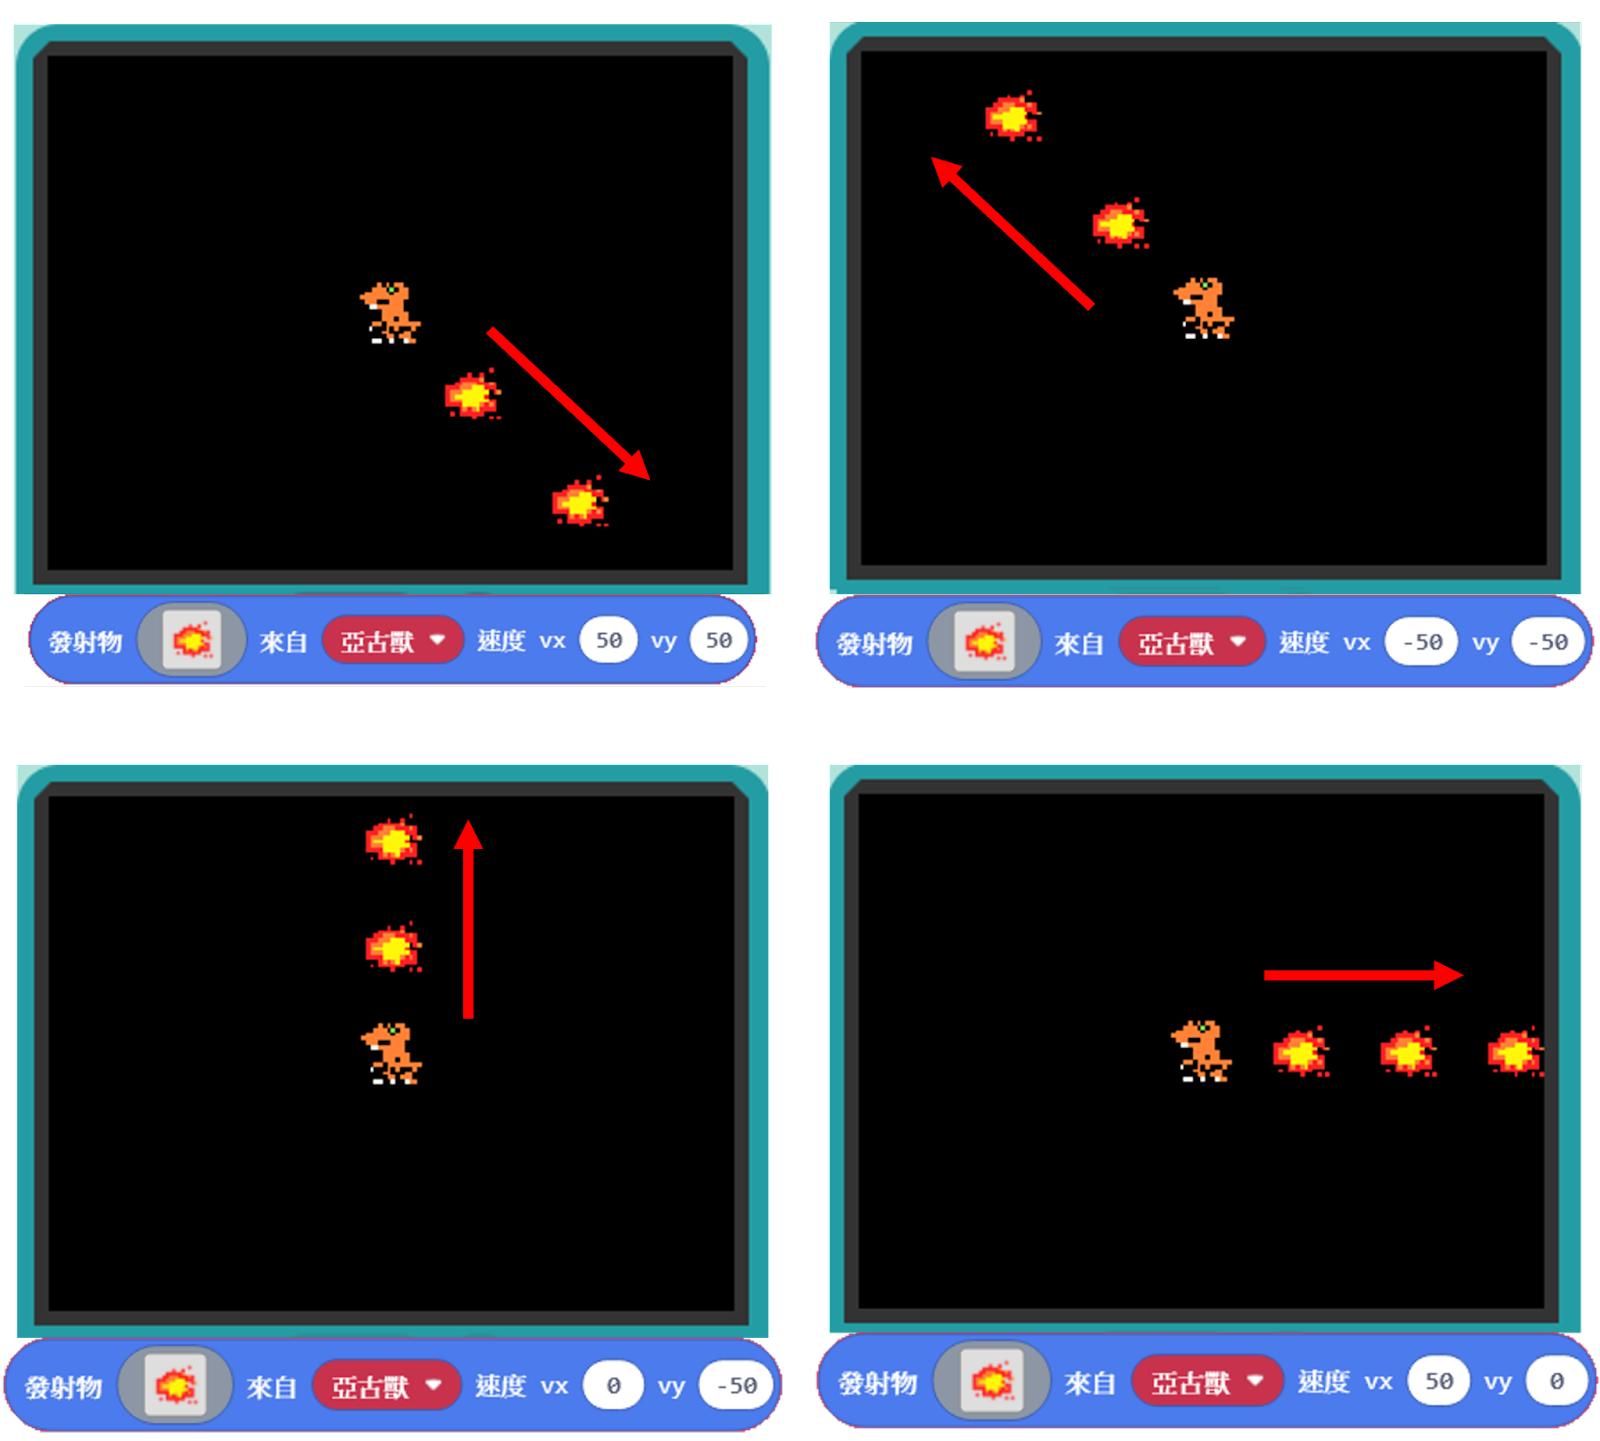
However, you will notice the burger always appears in a fixed spot. In a normal game, it should be “Randomly Generated” in different places. We can find the convenient block “pick random ( 0 ) to ( 10 )” within the “Math” category in the Block Toolbox.
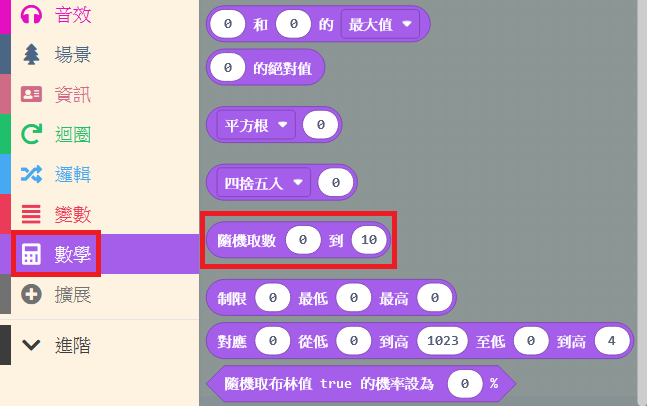
We can fill in two numbers, and it will randomly generate a new number between them. Quick thinkers might already know what to use this for!

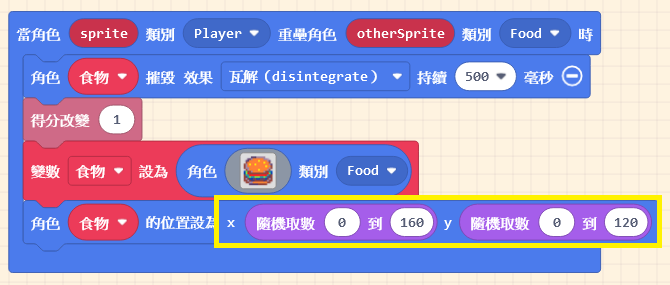
That’s right! We can use it to “Generate Coordinates.” Place this block into the x and y coordinate fields respectively. Fill in the ranges: 0~160 for the x-coordinate and 0~120 for the y-coordinate (based on screen pixel size).
After finishing, run it in the Game Simulator. Test it a few times, and you might notice that sometimes the burger disappears or gets stuck, as shown below:

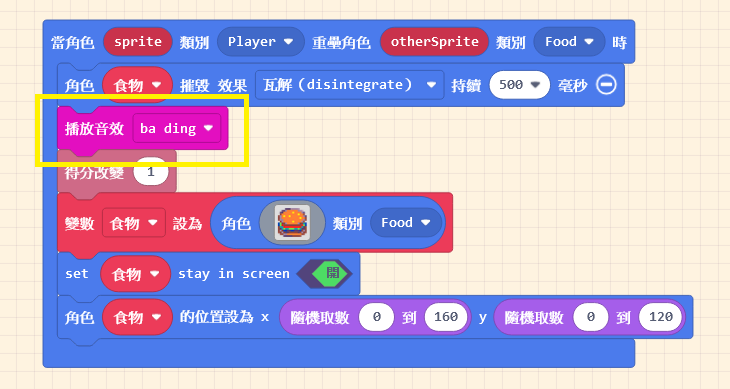
This is because we didn’t restrict it to appear strictly within the visible screen area. We can use the “set [mySprite] stay in screen <ON>” block found in the “Sprites” category.

Place this block after the “create sprite” block. This adds a restriction immediately when the burger is created, so it won’t go out of bounds when randomly positioning.
Remember to select the correct Variable Name (the target) at the beginning of the block.

Test it in the Game Simulator.

We have completed the scoring and random spawning functions, but the game feels a bit empty. Let’s add some sound! Specifically, when the burger is eaten. Add the “Music” block we learned earlier to the destruction event. You can find a suitable sound effect or design one yourself.
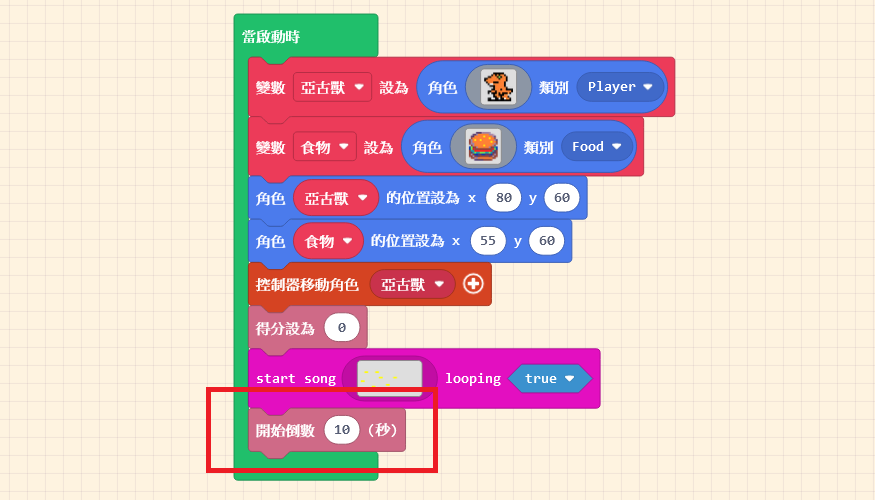
While you’re at it, add some background music to enrich the game presentation. Remember to set the “looping” option to “true” for continuous playback.

Adding a Challenge: The Countdown Gaining points endlessly without a result isn’t a game. Let’s add an element of excitement: a “Countdown Timer.” We will set a rule: if the score doesn’t meet the target when time runs out, the player loses.
Drag out the “start countdown ( 10 ) seconds” block from the “Info” category.

Place this block at the very bottom of the “on start” block. This means the countdown begins just as the game starts. Feel free to set the duration.
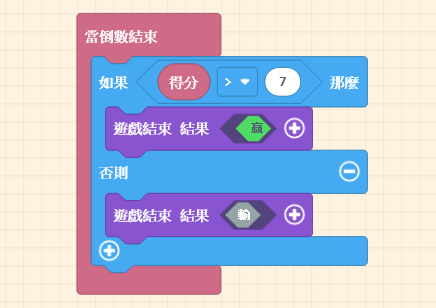
Then, we need to determine the result when the timer ends. Drag out the “on countdown end” block from “Info” and place it in the Workspace (empty area).
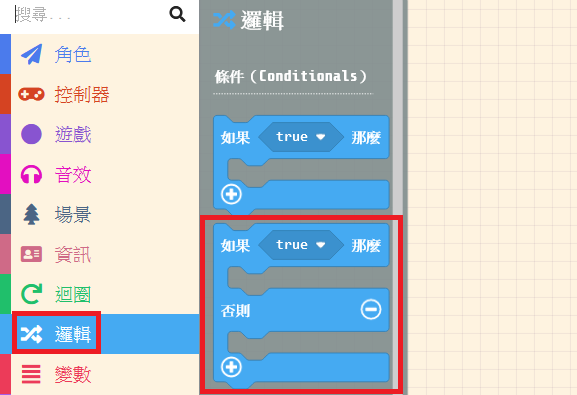
Next, we need to judge if our score meets the target. Drag out the “if… then… else” block from “Logic” and place it inside “on countdown end.”
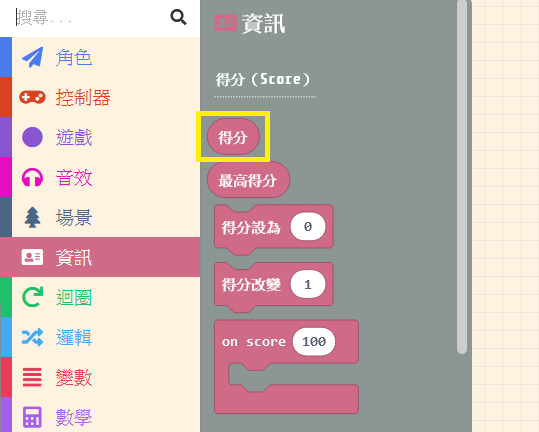
Drag out the “score” block (the oval shape) from “Info.” This block stores our current score.
To compare the score, we need a “Comparison” block. Drag out the “< ( 0 ) = ( 0 ) >” block from “Logic.”
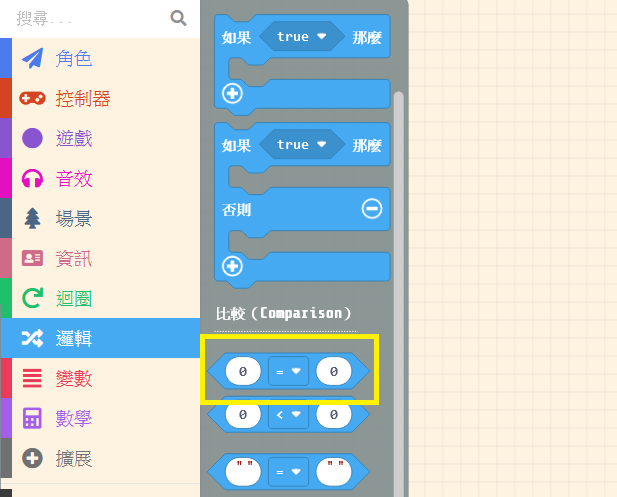
Combine these three blocks. In the dropdown menu of the comparison block, select “>” (greater than).

Choose your own target score.

Finally, the most critical block: select “game over <LOSE>” from the “Game” category. The option at the end determines whether the game is won or lost.

Add the different “Results” (Win/Lose) into the condition slots sequentially. Now, an exciting and fun game is complete!!🎉🎉🎉