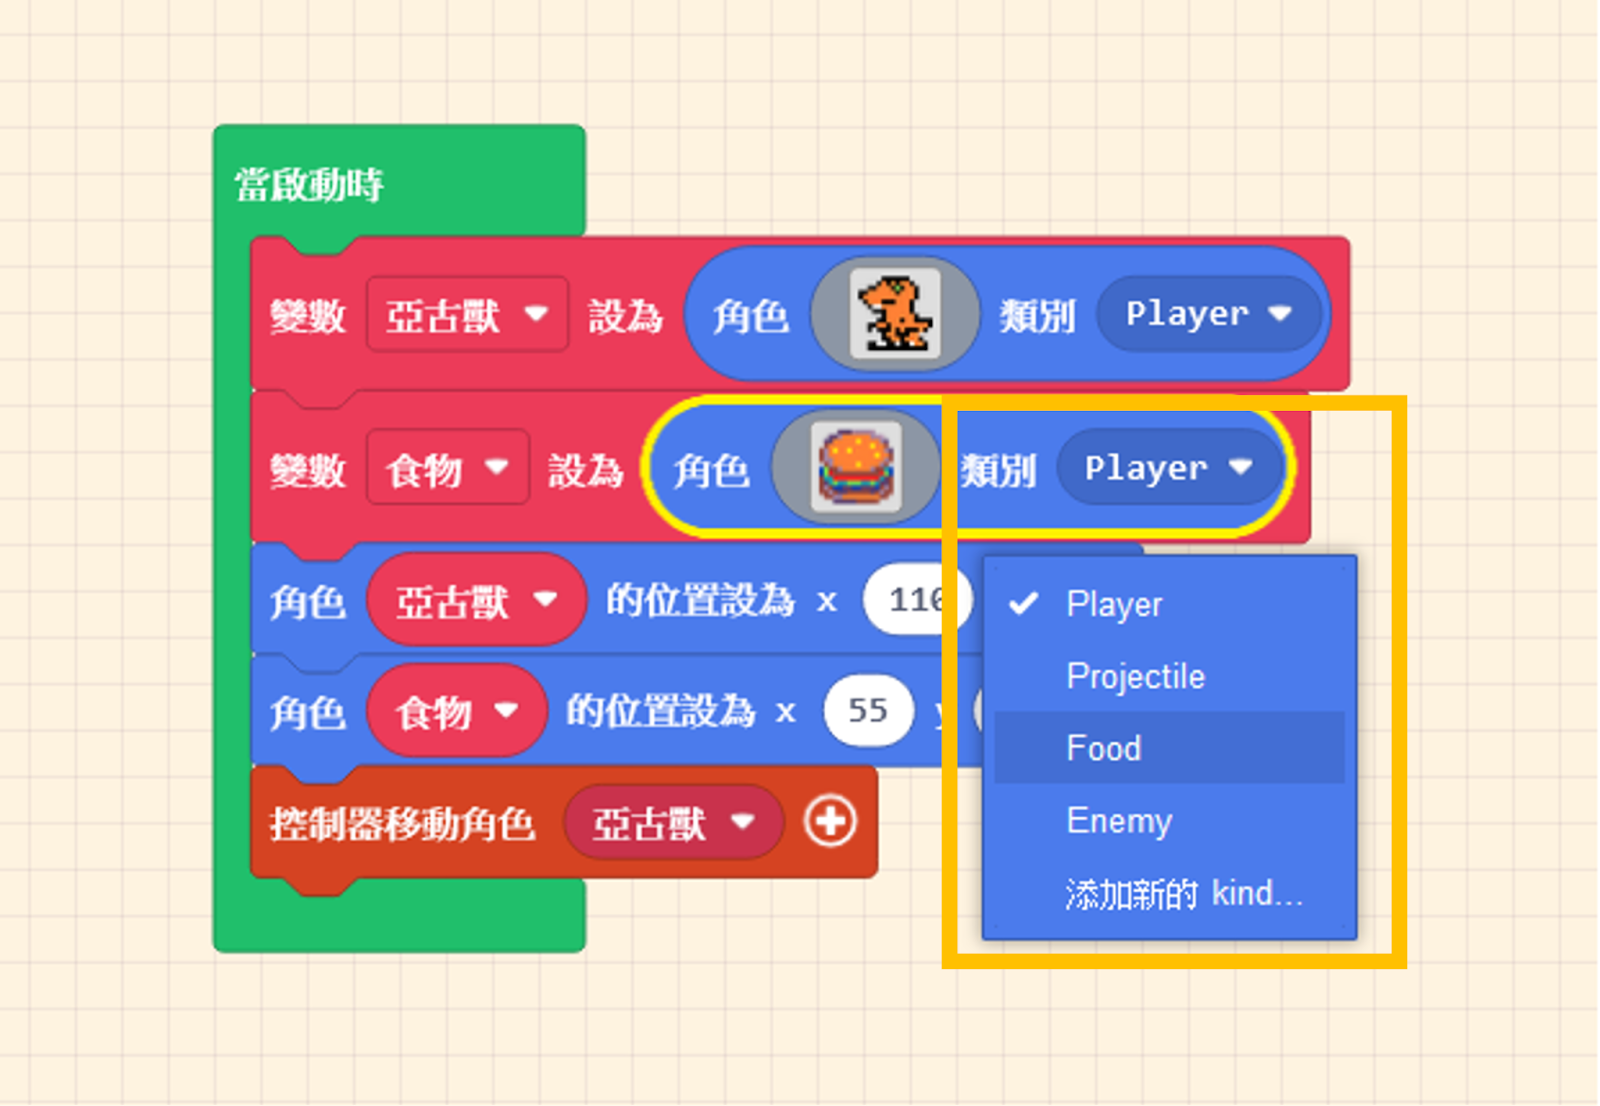
Next, let’s create a second sprite. Click on “Sprites” in the Block Toolbox, use the create sprite block, place it inside “on start,” and design its appearance (in this example, we selected a Burger from the Gallery).
You will notice that the default “Variable Name” has changed automatically. The editor does this to prevent errors.
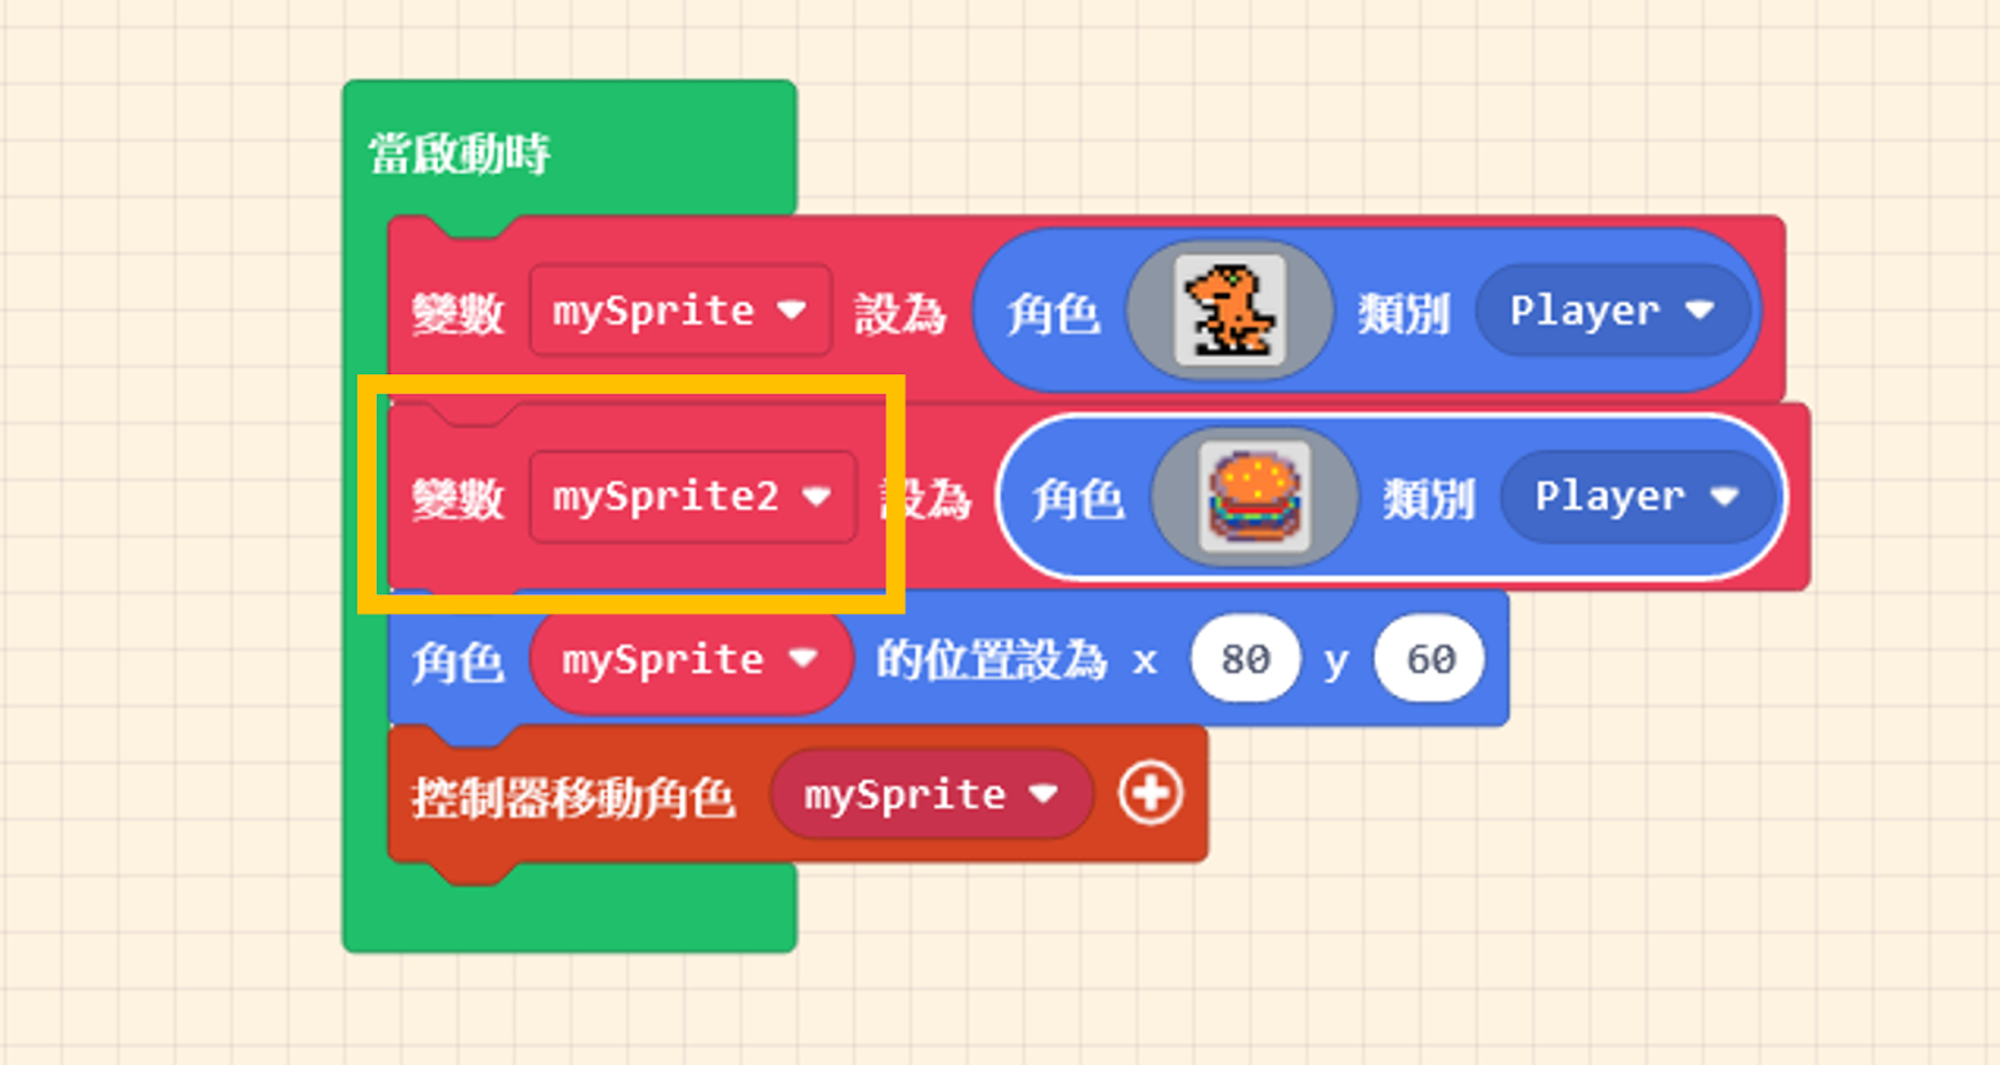
Let’s give these variables meaningful names! The sprite generated by default appears in the center of the screen. Let’s use the “set [mySprite] position to x ( 0 ) y ( 0 )” block we learned earlier to change the positions of these two sprites.

We can categorize sprites into groups to facilitate group control later. In this example, we set the Orange Dinosaur’s kind to “Player” and the Burger’s kind to “Food.” You can define these Kind names yourself.