In the previous units, we created a game. Since it was relatively simple, we couldn’t cover all features or different game genres. Therefore, this unit will propose some interesting ideas and solutions, guiding you through them step-by-step. We hope this will help you with problems you might encounter when designing your own games, or provide you with different directions for thinking.
11.1 Learning More Game Design Methods
11.1.1 Projectile Variations
Besides basic gameplay, standard 2D shooting games often feature character enhancements. For example, picking up an “Energy Ball” might strengthen the player’s abilities or change the missiles fired. There are many types of projectile variations: simple damage increase, size increase, quantity increase, or shape changes.
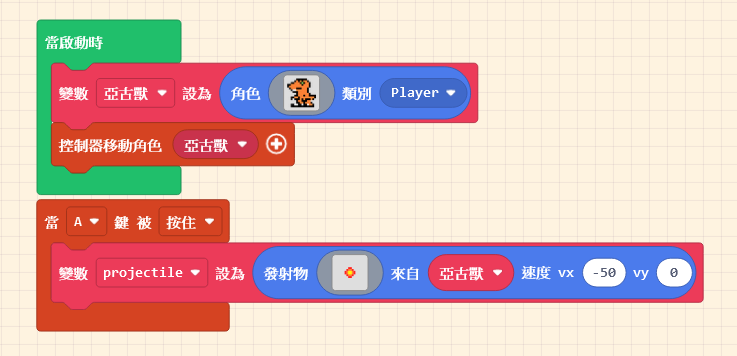
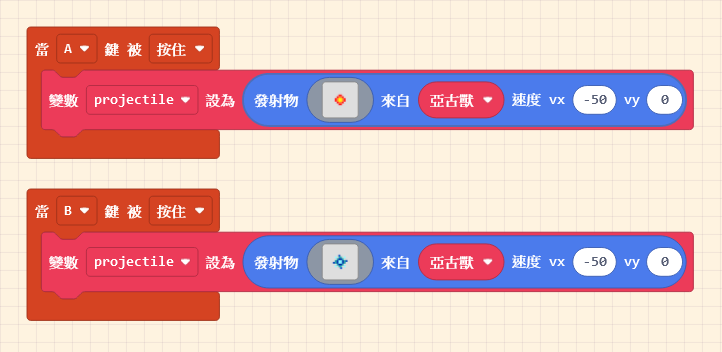
We will use a simple example to teach you how to increase the number of bullets or change their appearance. We will demonstrate with the simplest method. The image below shows the block for firing projectiles:
Let’s start with changing the appearance. First, duplicate the “on [A] button [pressed]” block and change it to “B button.”
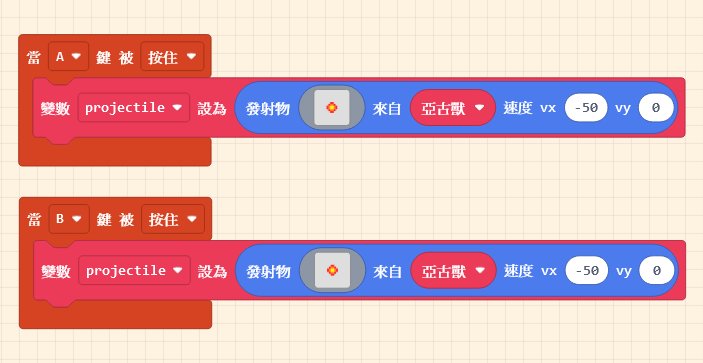
Next, change the projectile image in the “on [B] button [pressed]” block, and test the effect using the Game Simulator.
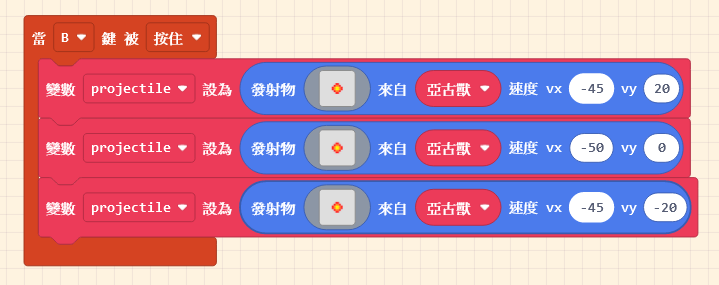
What if you want a Shotgun (Spread) effect? It’s very simple: just add a few more projectile blocks inside the container. (=゚Д゚=) ▄︻┻┳━ ·…`.
11.1.2 Triggering Changes (Power-Ups)
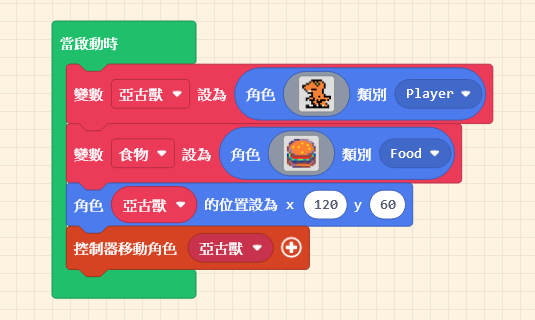
We will use “eating a Burger” as the trigger to change the bullets. First, add a new Sprite of kind “Food” (the Burger) and adjust the distance between it and the player.
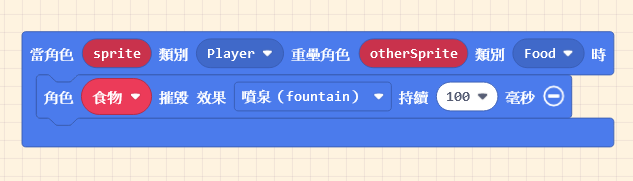
Next, set up the “Overlap” event so the Burger disappears (with an effect) when touched.
You are already familiar with the steps above. But what about the crucial “Change”? We can implement this using the “Variable” concept we mentioned before.
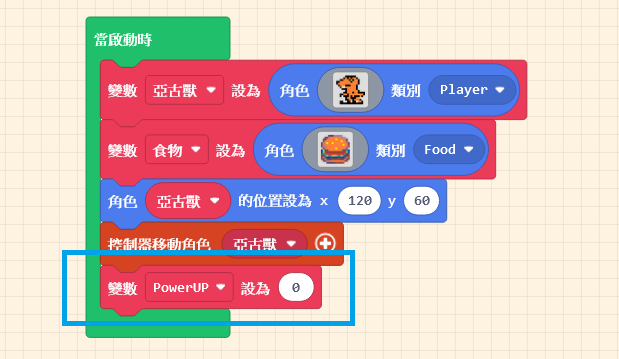
First, inside “on start“, create a new variable and set an initial value. You can name the variable whatever you like, but a name that fits its purpose helps keep your logic clear. Since we are changing the bullet style to represent increased attack power, let’s name it “PowerUP“.
- When the variable “PowerUP” is “0,” we want the bullet to be the original style.
- When it becomes “1,” we want the upgraded bullet style.
So, at the end of the “Burger Eaten” block, add a block to set variable [PowerUP] to [1].

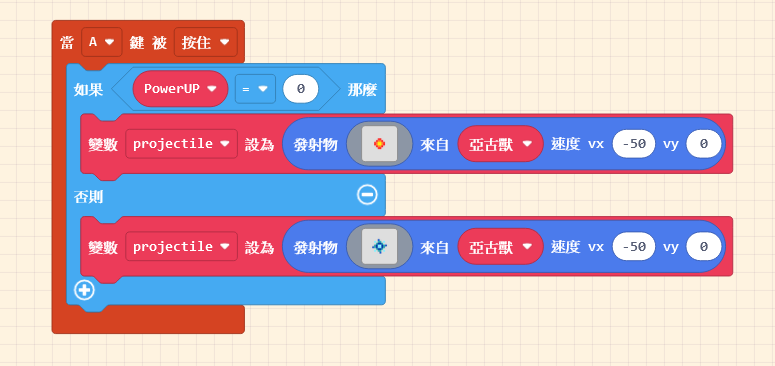
Finally, inside the “on [A] button [pressed]” block, add a logic condition (if… else…). Copy the bullet logic from the “B button” block into the appropriate slot.
Since the “on [B] button [pressed]” block was just for testing our design, now that we have integrated the patterns into the “on [A] button [pressed]” block, you can delete the B button block.
Please test in the Game Simulator to see if the bullets change.
11.1.3 Jumping and Crouching
If you want to design a game like the Google Dino Game, the character needs to “Jump” and “Crouch.” For crouching, we also use the method of changing the sprite’s image.
However, unlike projectiles where we spawn new objects, here we are modifying the existing character, so the process is slightly different.
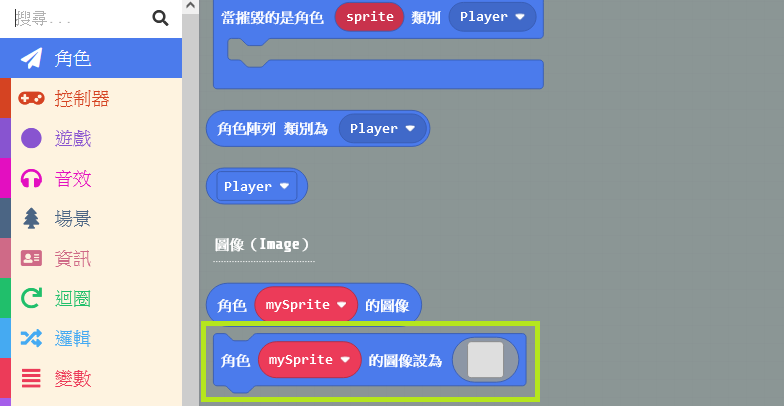
To change the sprite’s appearance, we can use the “set [mySprite] image to [ ]” block found in the “Sprites” category.
Set the variable name to the character you want to transform and draw the “Crouching Pose.” We want the character to crouch when “A is pressed” and return to the original state when “A is released.”
Therefore, we need to add another block: “on [A] button [released],” and place the original standing image inside it.

11.1.4 Method for Jumping
For movement, we can refer to “Projectiles.” Projectiles move because we adjusted their Velocity.

By the same logic, if we adjust the character’s velocity, can it fly into the sky? Yes! In the “Sprites” category, you can find blocks to change sprite position and velocity.
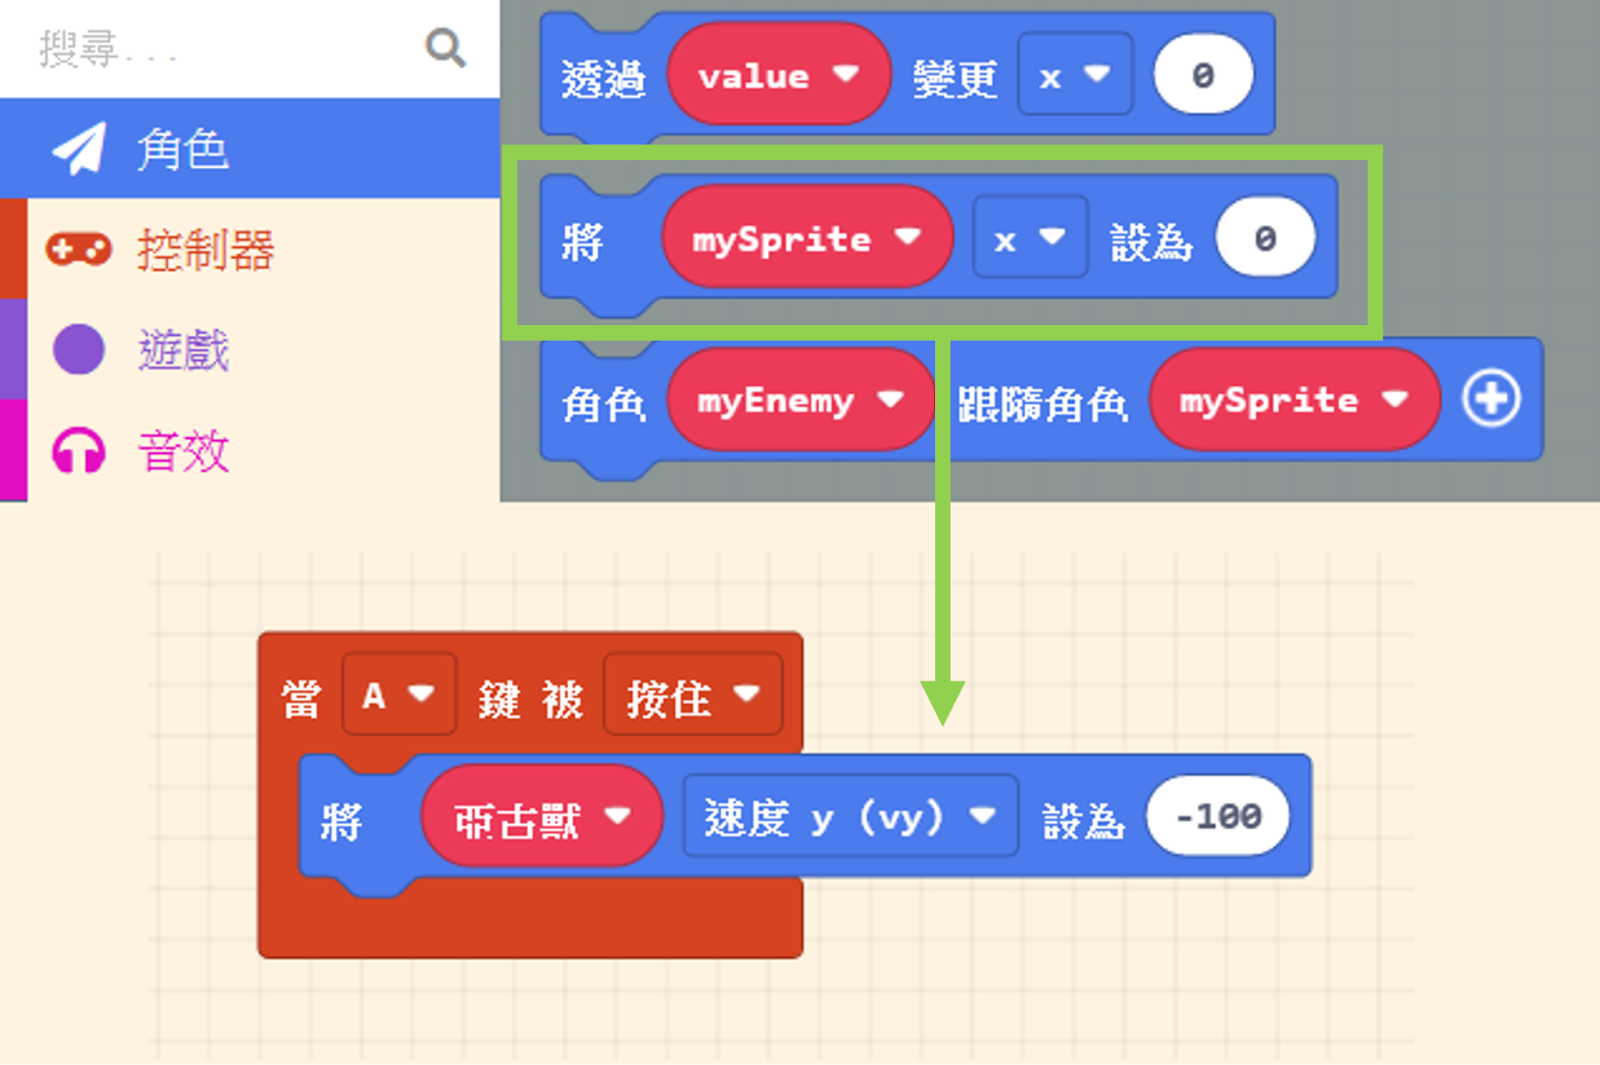
Once velocity is changed, if not adjusted again, it will maintain that state (flying upwards forever).

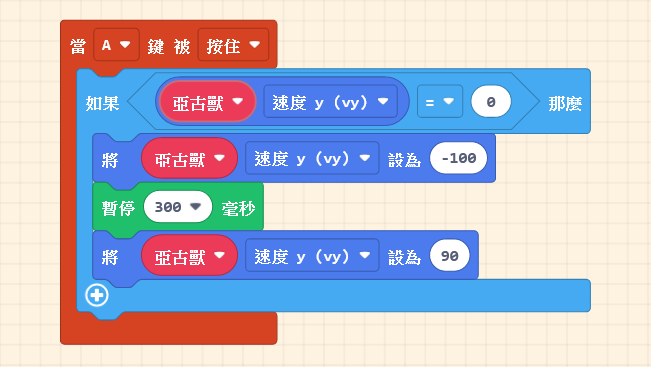
So, let’s use the “pause (ms)” block. After flying up for a short time, we change the velocity to the opposite direction (downwards) to make it fall.

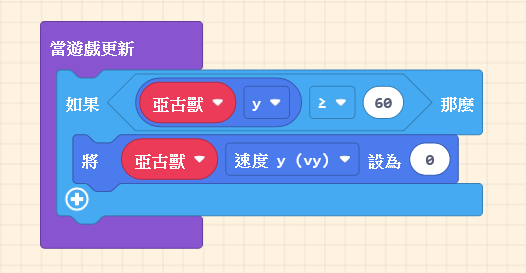
To prevent the player from spamming the “A button” and causing unexpected behavior (like infinite jumping), we add a check condition: only trigger the jump when the character’s Velocity (vy) is “0.”
Okay, now the character keeps falling downwards forever, right? This is because the velocity hasn’t been reset to “0.”
We need to restrict the character so that when it hits the “ground,” the velocity becomes “0.” Assuming the character’s ground position is at y = 60: We can continuously check the character’s “y coordinate” during the game. As long as it is equal to or greater than 60 (the lower the position, the larger the number), we set the character’s velocity back to “0,” as shown below:
This way, the character can jump and land normally.

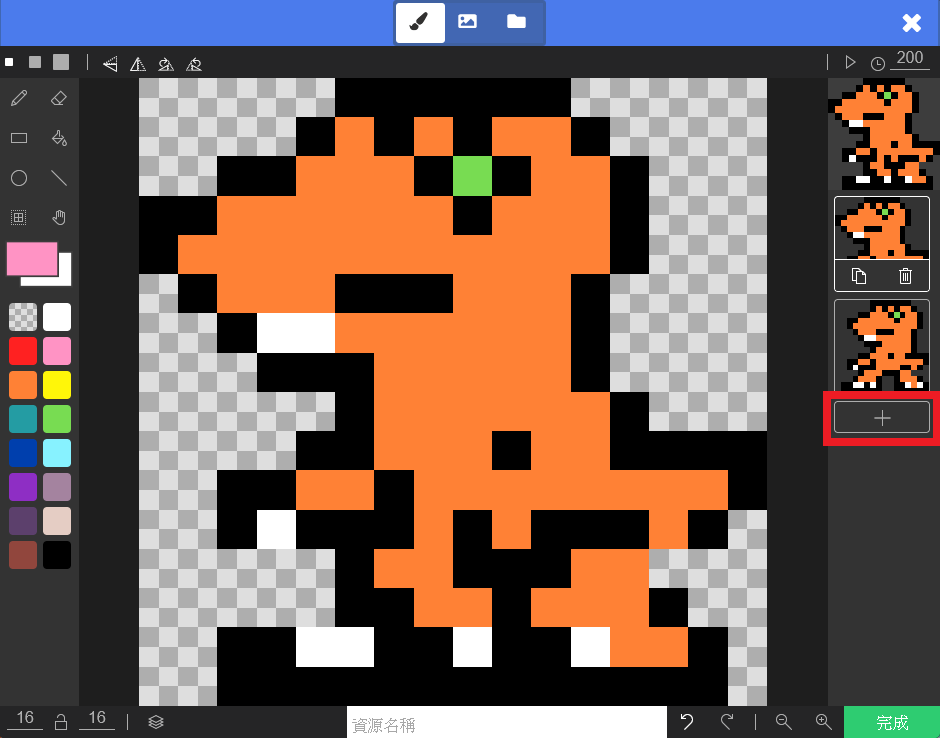
11.1.5 Sprite Walking Animations
Currently, our character moves as a static image sliding around. We can make it more lively using blocks from the “Advanced” > “Animation” category.

Click the “Frames” option in the block (the square icon) to add multiple images on the right side. We will piece these images together to create an animation. The more frames you have, the smoother it looks!
Since we want the character to animate when direction keys are pressed, we can change the “A” button to “Any” button in the dropdown menu. Place the animation block inside and turn “Loop” to “On.”
Now, the character will animate when moving. Don’t forget to add the action for when the button is “Released.” There is a “stop [all] animations on [mySprite]” block in the “Animation” category; use this to stop the animation when you are not moving.

Doesn’t it look much more lively now? (´ω)人(´ω)