We’ve been dodging and weaving for two units, but now it’s finally time to teach you how to attack! We will start with how to make the sprite fire missiles, explain how to adjust the firing direction, and finally set the effect when the villain is hit by a missile.
To make it easier for everyone to get started, we will adjust the original game content. Please save your previous game file separately to avoid overwriting your original work with these changes.
10.1 Learning to Save and Load Game Files
First, open the game you made in the previous unit.
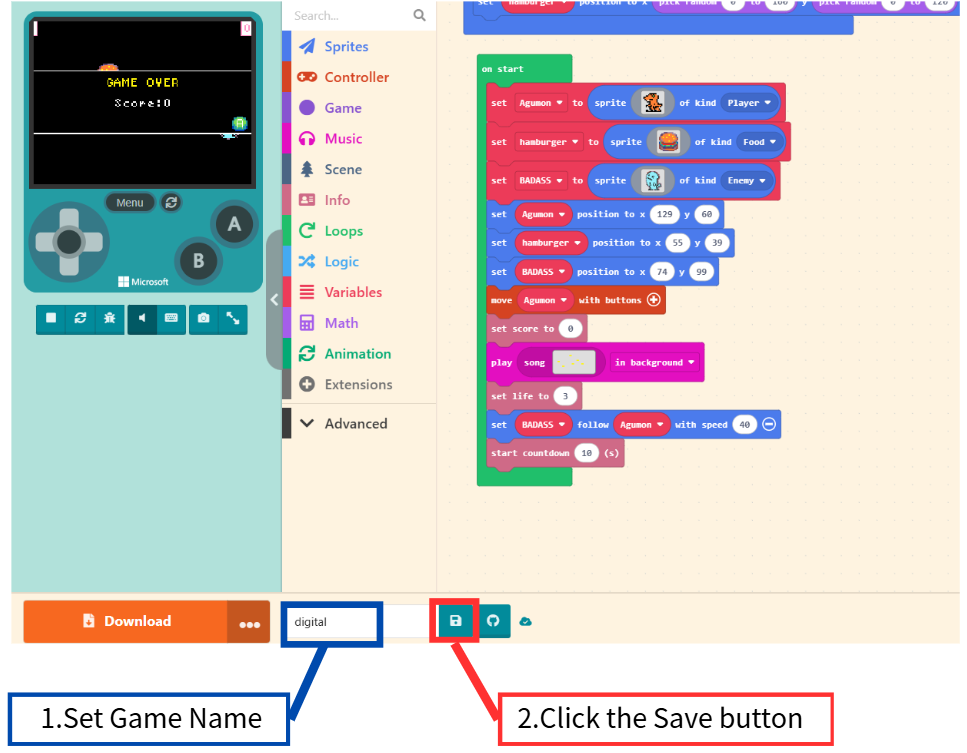
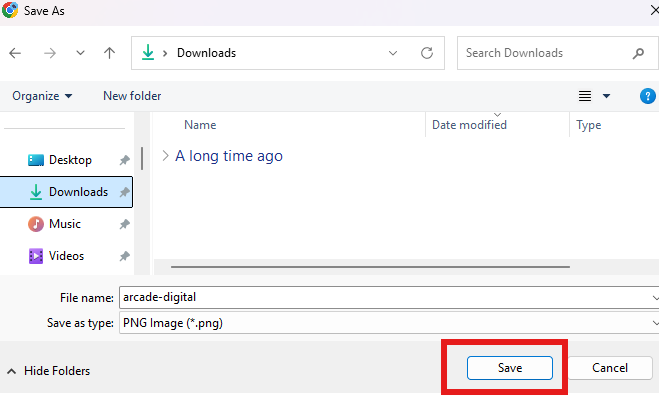
Save the game file to your computer; you can modify the file name if you wish.
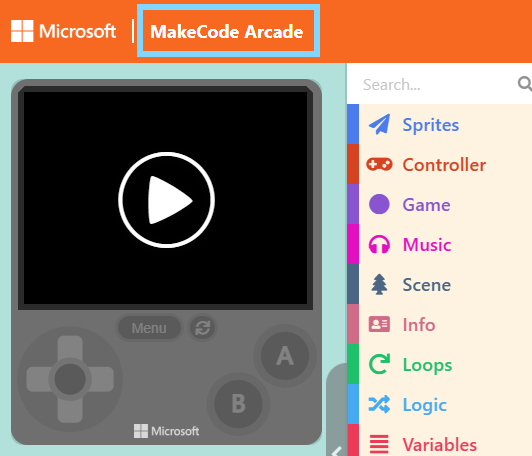
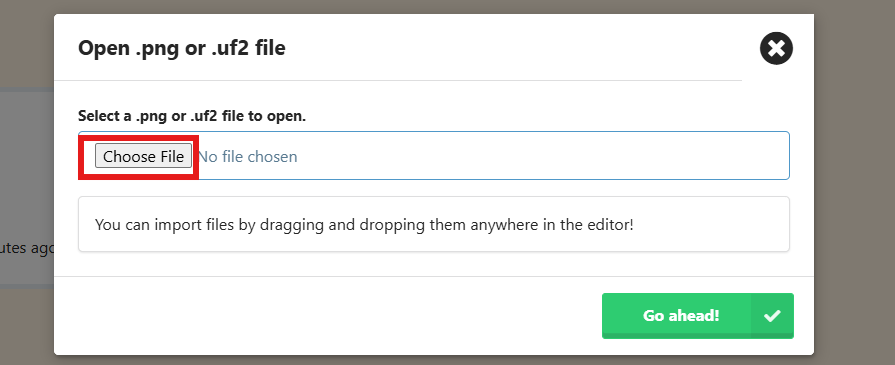
Next, to load a game: First, return to the Game Project List by clicking “MakeCode Arcade” in the top-left corner.
Click the “Import” button on the right.

Then click “Import File…“.

Click the “Browse…” button (or “Choose File”).
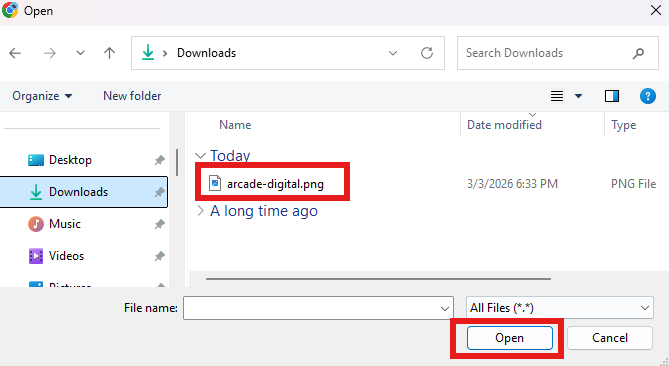
Find the file you saved earlier and click Open.
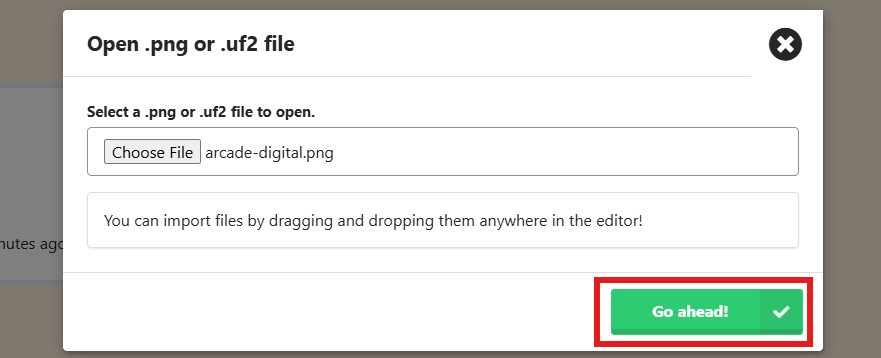
Finally, click “Go ahead!” to load the project.
10.2 Granting Attack Abilities to the Sprite
As gameplay mechanics increase, we need to adjust the way the game is played. Too many restrictions or excessive complexity won’t necessarily improve the game experience—balance is key.
Since we are about to gain attack methods and face the constant threat of being defeated by the villain, determining the winner is no longer as difficult as it was in the beginning. Therefore, we can remove some non-essential elements, such as the “Countdown.”
Step 1: Delete the “start countdown ( 10 ) seconds” block.
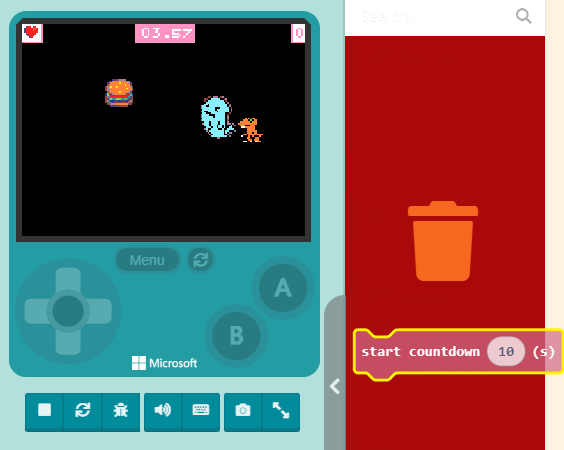
Step 2: Delete the entire “on countdown end” block container.
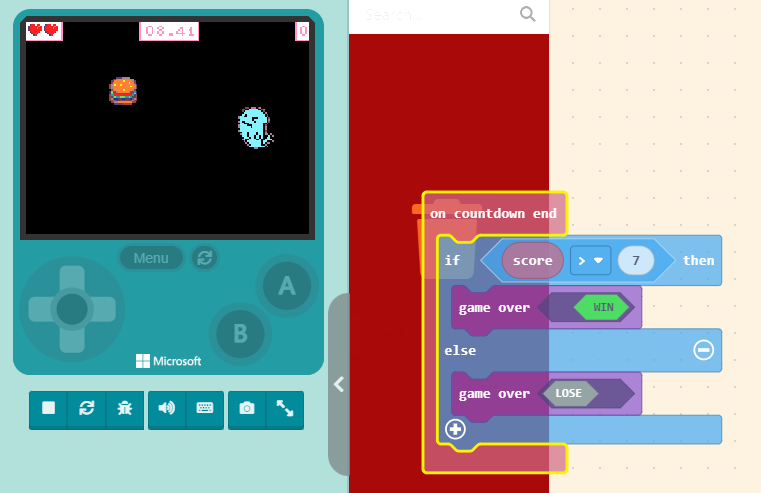
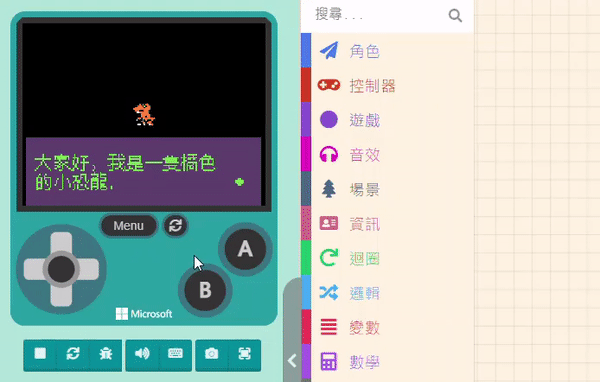
After removing the “Countdown,” the game becomes a pure survival battle. As long as you don’t touch the villain, the game continues. When your Life hits zero, the game will automatically end and display your score.
10.3 Learning to Adjust Missile Firing Direction
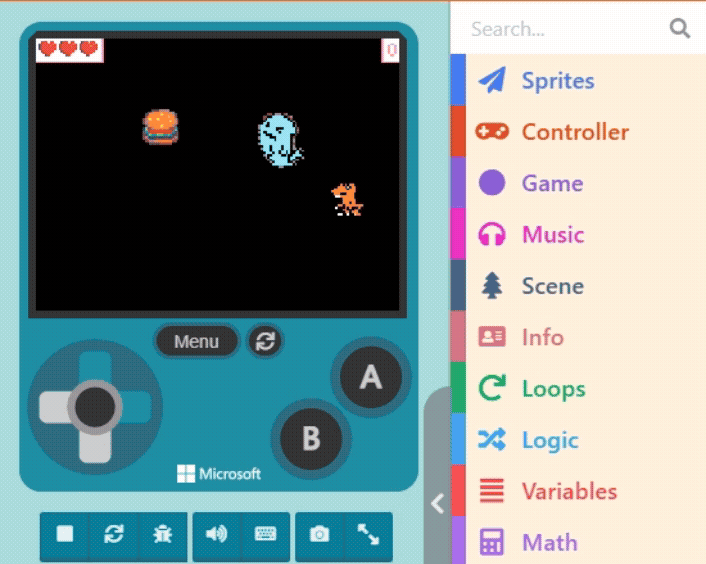
Making a sprite fire missiles is not complicated. The relevant blocks are located in the “Sprites” category. Look closely, and you will see two blocks related to “Projectiles“.
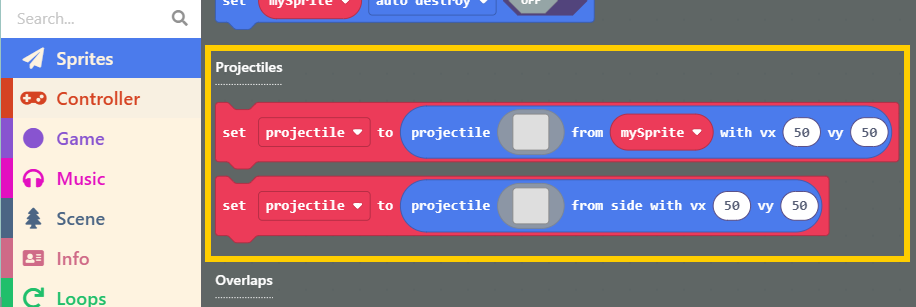
- projectile from side: The first block is used to set projectiles generated from the “background” (side). Using the “Space Destroyer” example, the “Meteors” in that game are generated using this block.
- projectile from sprite: The second block, as the name suggests, creates projectiles from a “Sprite.” In “Space Destroyer,” the laser beams fired by the fighter jet are created using this block.
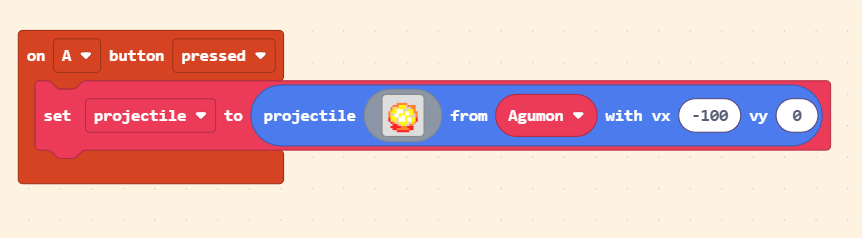
To add the attack function to our character, we need the second block. Drag it out first.
We want the attack timing to be controlled by the player, so click on the “Controller” category and drag out the “on [A] button [pressed]” block.
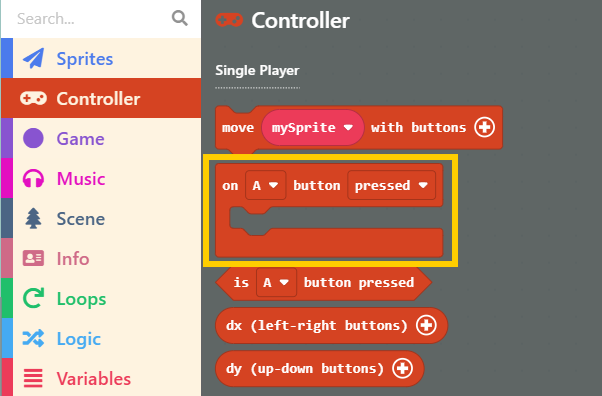
Combine these two blocks. You can draw the “Pattern” for the projectile (e.g., a small flame) or select one from the Gallery. Next, select the variable name of the player-controlled sprite. The “vx” and “vy” at the end represent the “Velocity” in the X and Y directions, respectively. The adjustable range is -100 to 100.
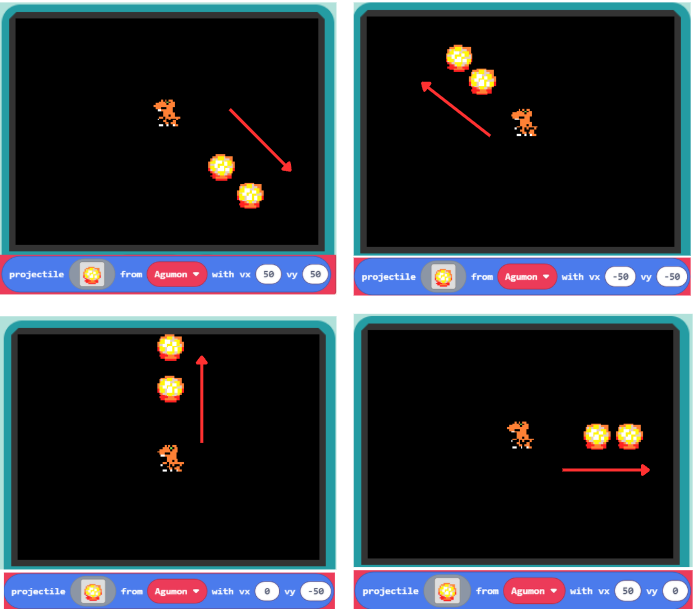
- vy: Velocity Y (Vertical speed). Positive is Down, Negative is Up.
- vx: Velocity X (Horizontal speed). Positive is Right, Negative is Left.

The effect of speed adjustment is shown below; feel free to experiment. Positive and negative values change the direction. Try changing vx to 30 and vy to 75, and see the result in the simulator.
To make the drawn “Small Flame” move at maximum speed in the direction the character is facing, set it to move straight (e.g., from left to right, set vx to a positive value like 100 and vy to 0).
10.4 Post-Hit Steps
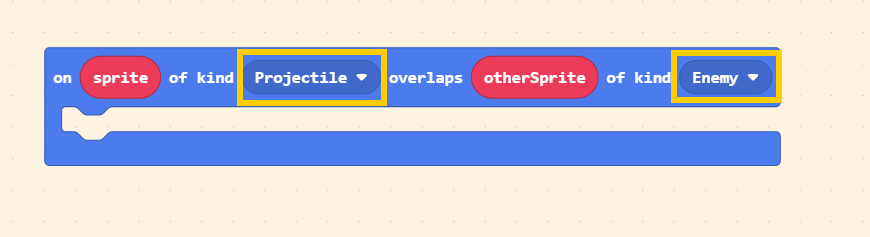
Next, let’s design the action for when the “Small Flame” hits the villain. We use the “Overlaps” block again. Set the Kinds to “Projectile” and “Enemy.”
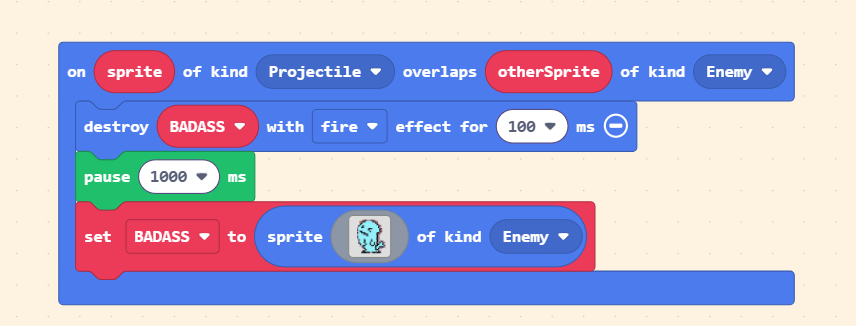
When the target is hit, we want the villain to be destroyed and show a special effect. It is recommended to keep the effect duration short; otherwise, the screen will look chaotic.
Since the villain disappears after being destroyed, we need to create a new one. You can directly Copy the blocks used to create the villain inside the “on start” block and Paste them here.
To prevent the villain from reappearing too quickly, add a “pause” block between the destruction and the creation steps. You can set the pause duration as you like.
Finally, don’t forget to add the “set [myEnemy] stay in screen <ON>” block for the newly created villain! This prevents it from spawning outside the screen or getting cut off by the border.
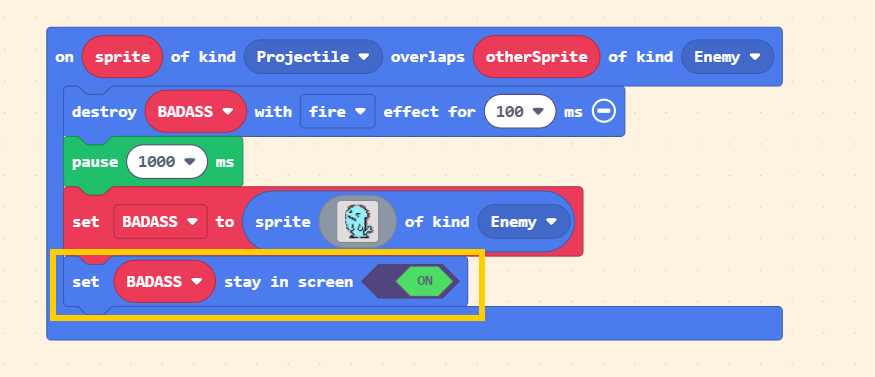
Once finished, test it in the Game Simulator to see if everything works correctly.