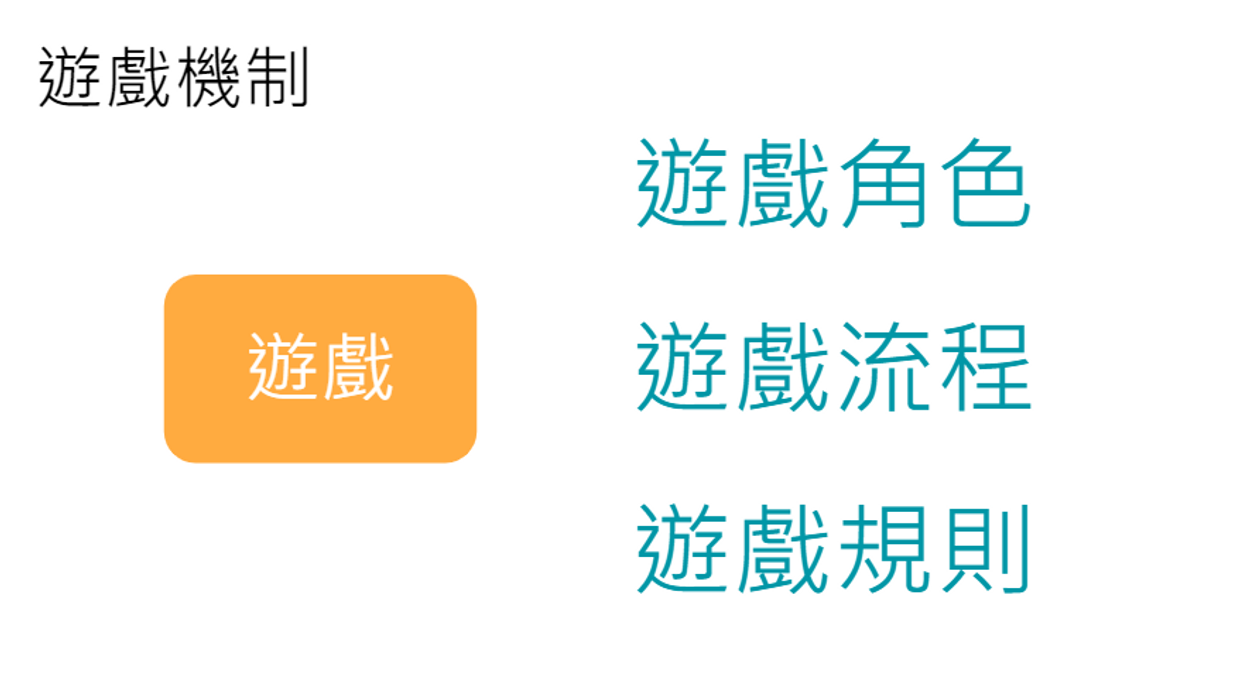
To design a simple game, you need Sprites, Game Goals, a Story, and Scenes. After studying the previous units, we can already design our own Sprites, use the controller to move them, and create prompts and dialog boxes.
We have basically achieved the “Sprite” and “Story” elements, but we are still missing “Goals” and “Scenes.”
- 🎯Game Goals: These are the conditions to clear a stage, such as defeating a boss😈 to win or collecting a certain number of gems💎 to pass a level🥳. They are the source of the player’s sense of achievement.
- 🌄Game Scenes: These refer to the background visuals🏜️ and sound effects🔊 used to enrich the gameplay process. The right background lets players know where they are—whether exploring a dungeon or shopping in a town. Sound effects assist the sensory experience; for example, playing tense music in a dungeon, or adding sound cues when attacking enemies or picking up treasures.
Next, we will start by designing the scene, guiding everyone to draw backgrounds and learn how to add sound effects.
6.1 Designing Game Level Backgrounds
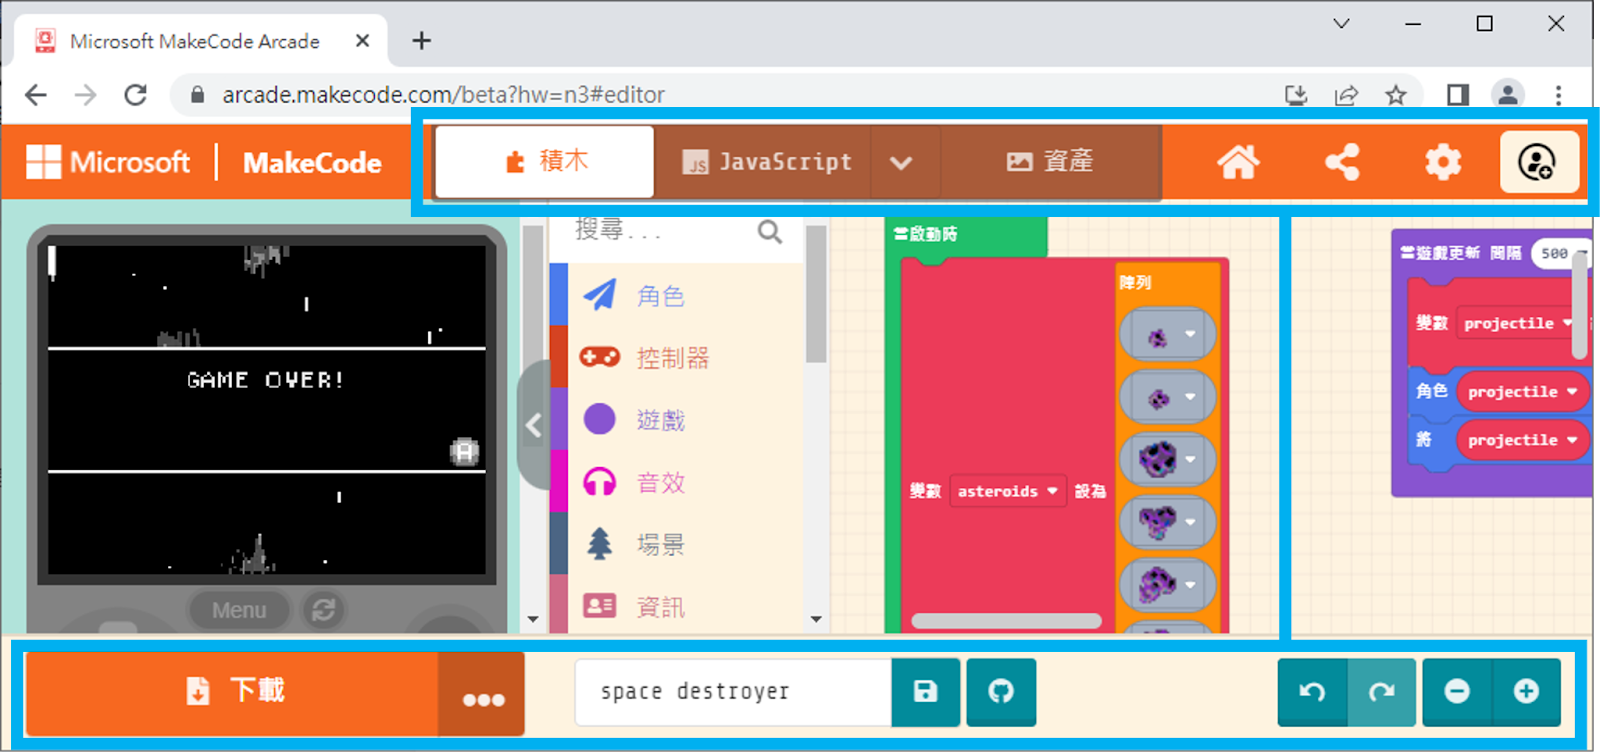
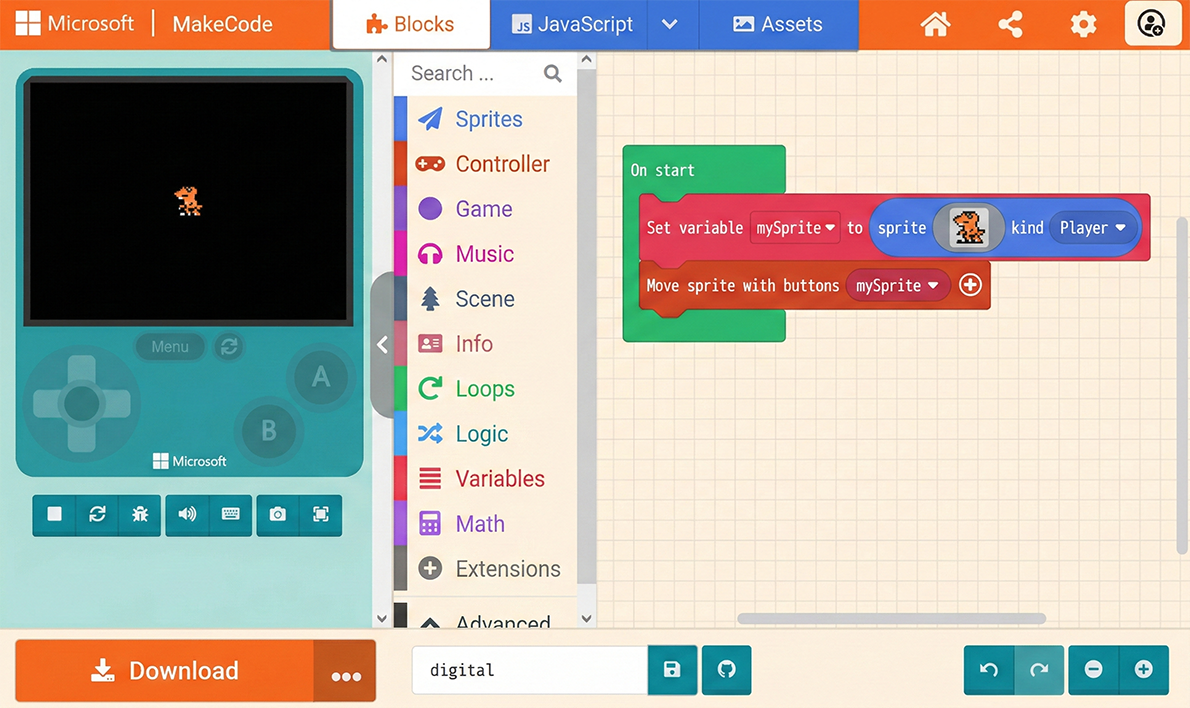
First, please enter MakeCode Arcade and open your project with your Sprite, as shown below:
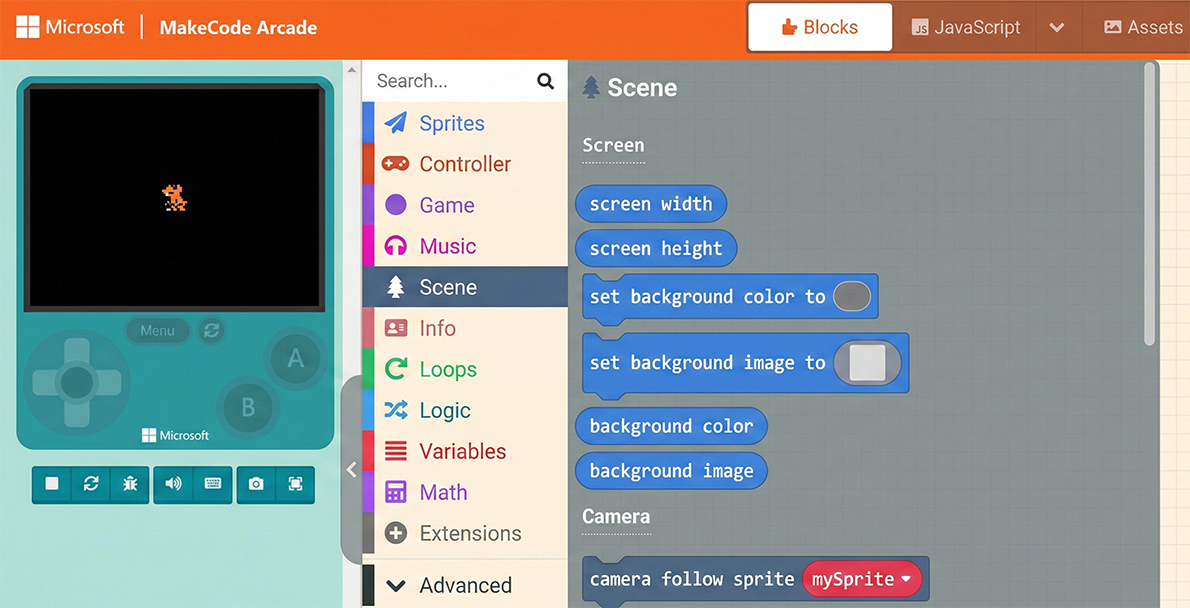
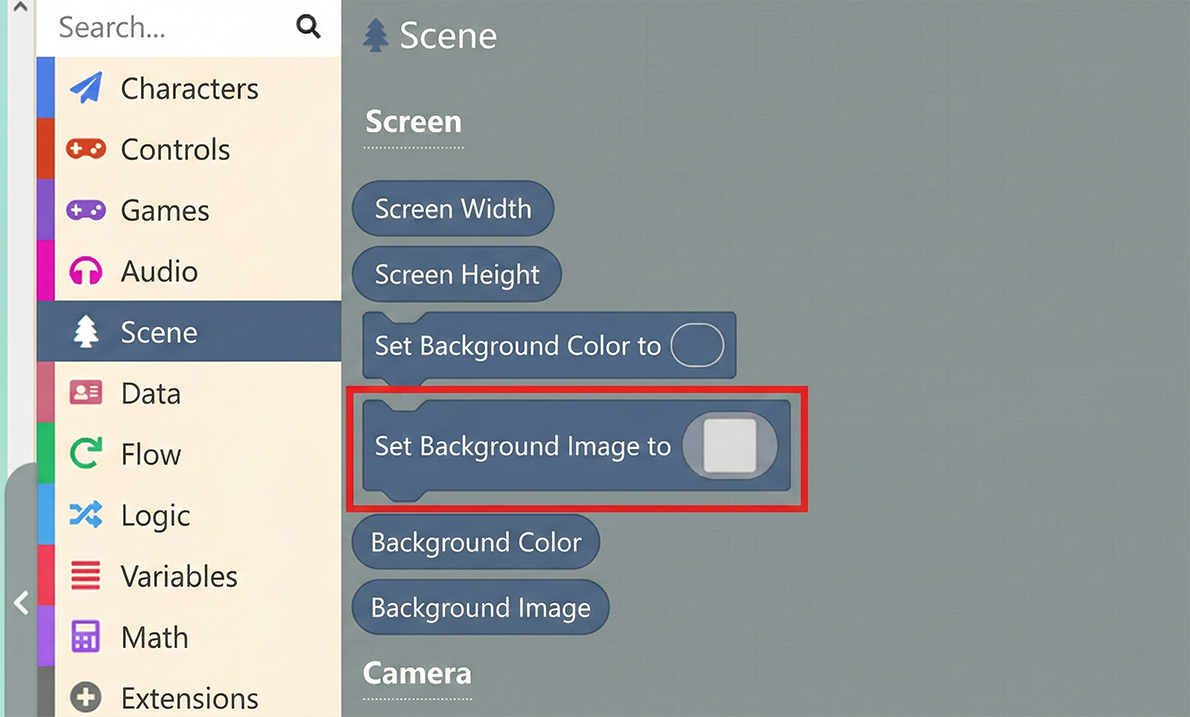
You can see a “Scene” category in the Block Toolbox. Click it to reveal many blocks related to scene settings in the list.
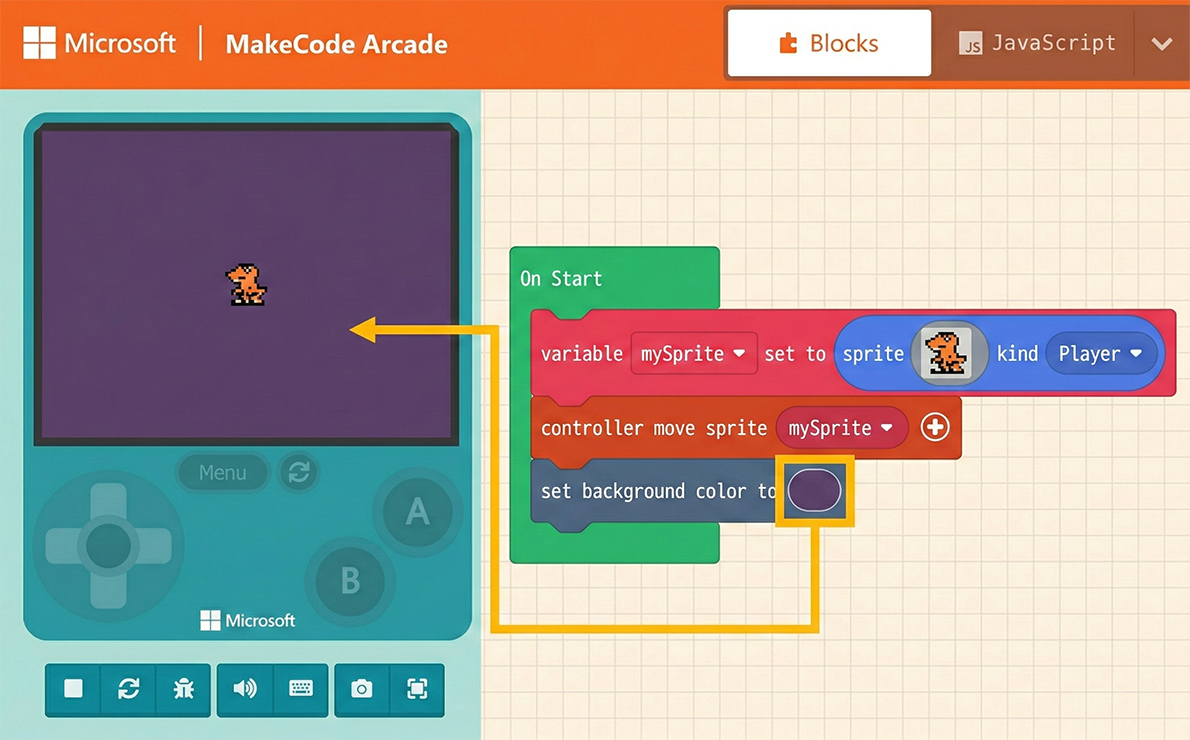
First, let’s try the “set background color to ( )” block. Drag it into the “on start” block. Clicking the color box at the end of the block opens the Color Palette.
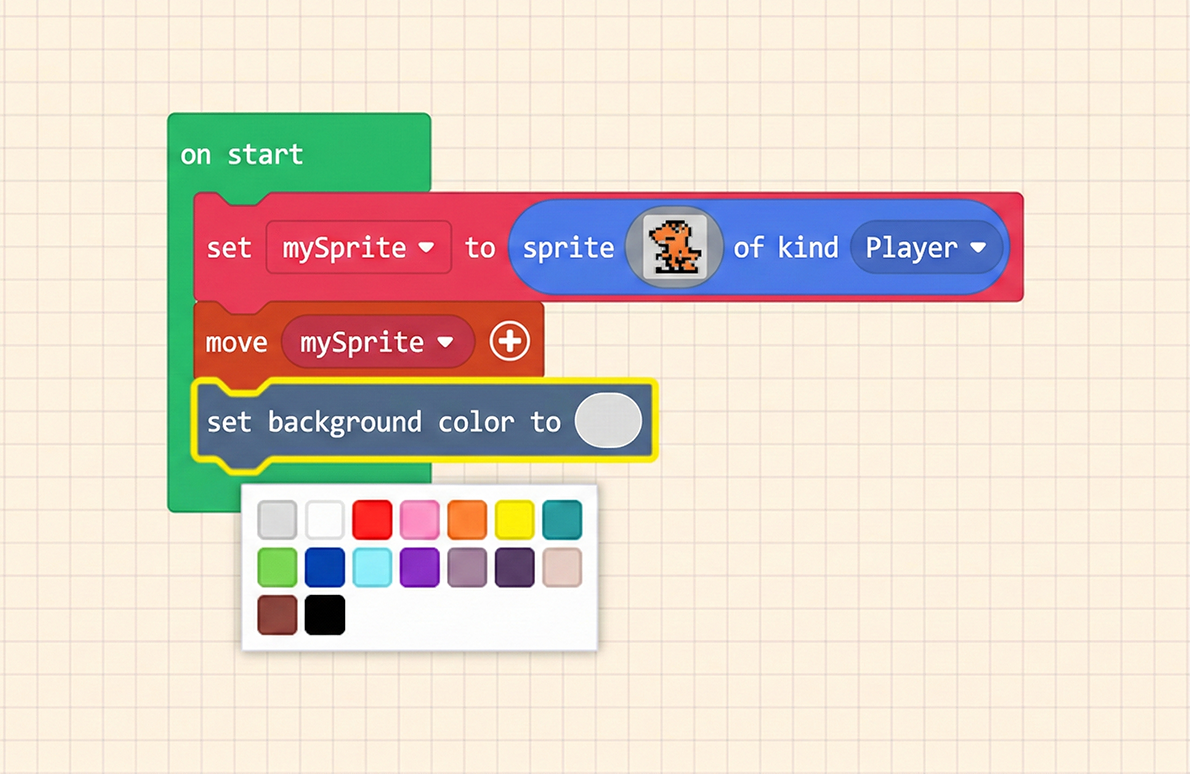
The “set background color to ( )” block is quite simple; it quickly changes the background to a single color. This is suitable for occasions where you need to highlight the Sprite, or for scenes with many characters and items, where a simple background prevents the screen from looking too cluttered.
However, we often need rich backgrounds to create the game’s atmosphere, so we need to draw them ourselves. Inside the “Scene” list, you can find the “set background image to ( )” block.
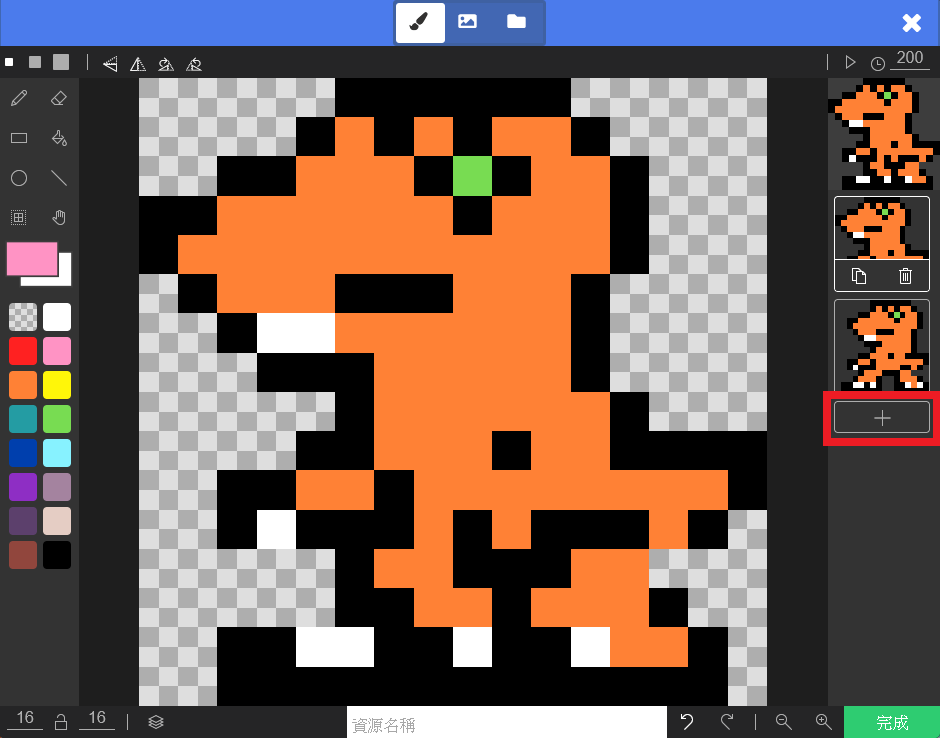
Let’s replace the previous “set background color” block with the “set background image to ( )” block. Clicking the box at the end opens the familiar editor. Just like designing Sprites, we can use these tools to draw backgrounds.
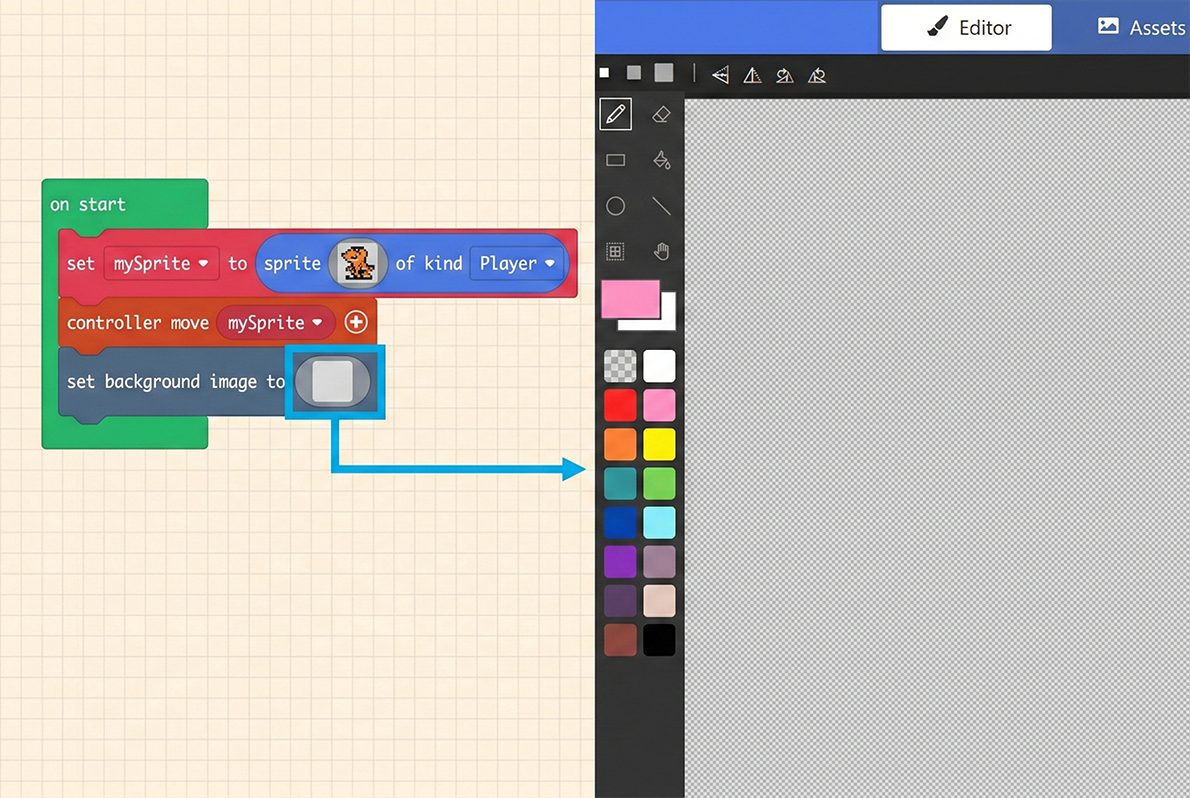
The background drawing interface also has a “Gallery” to choose from, or you can draw the background yourself.😝

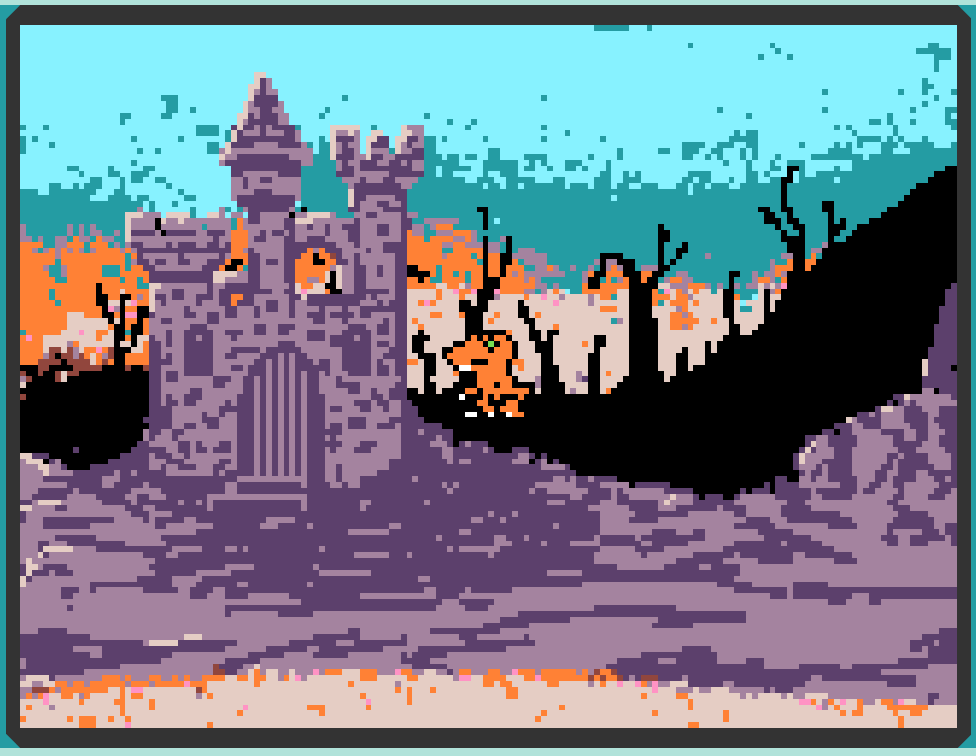
Some background assets or hand-drawn backgrounds might have concepts of height or depth. For example, in the image below, the scene is outside a spooky castle. The orange dinosaur seems to be standing in a strange position, as if floating in mid-air. In this case, we need to adjust the Sprite’s position to match the background layout.
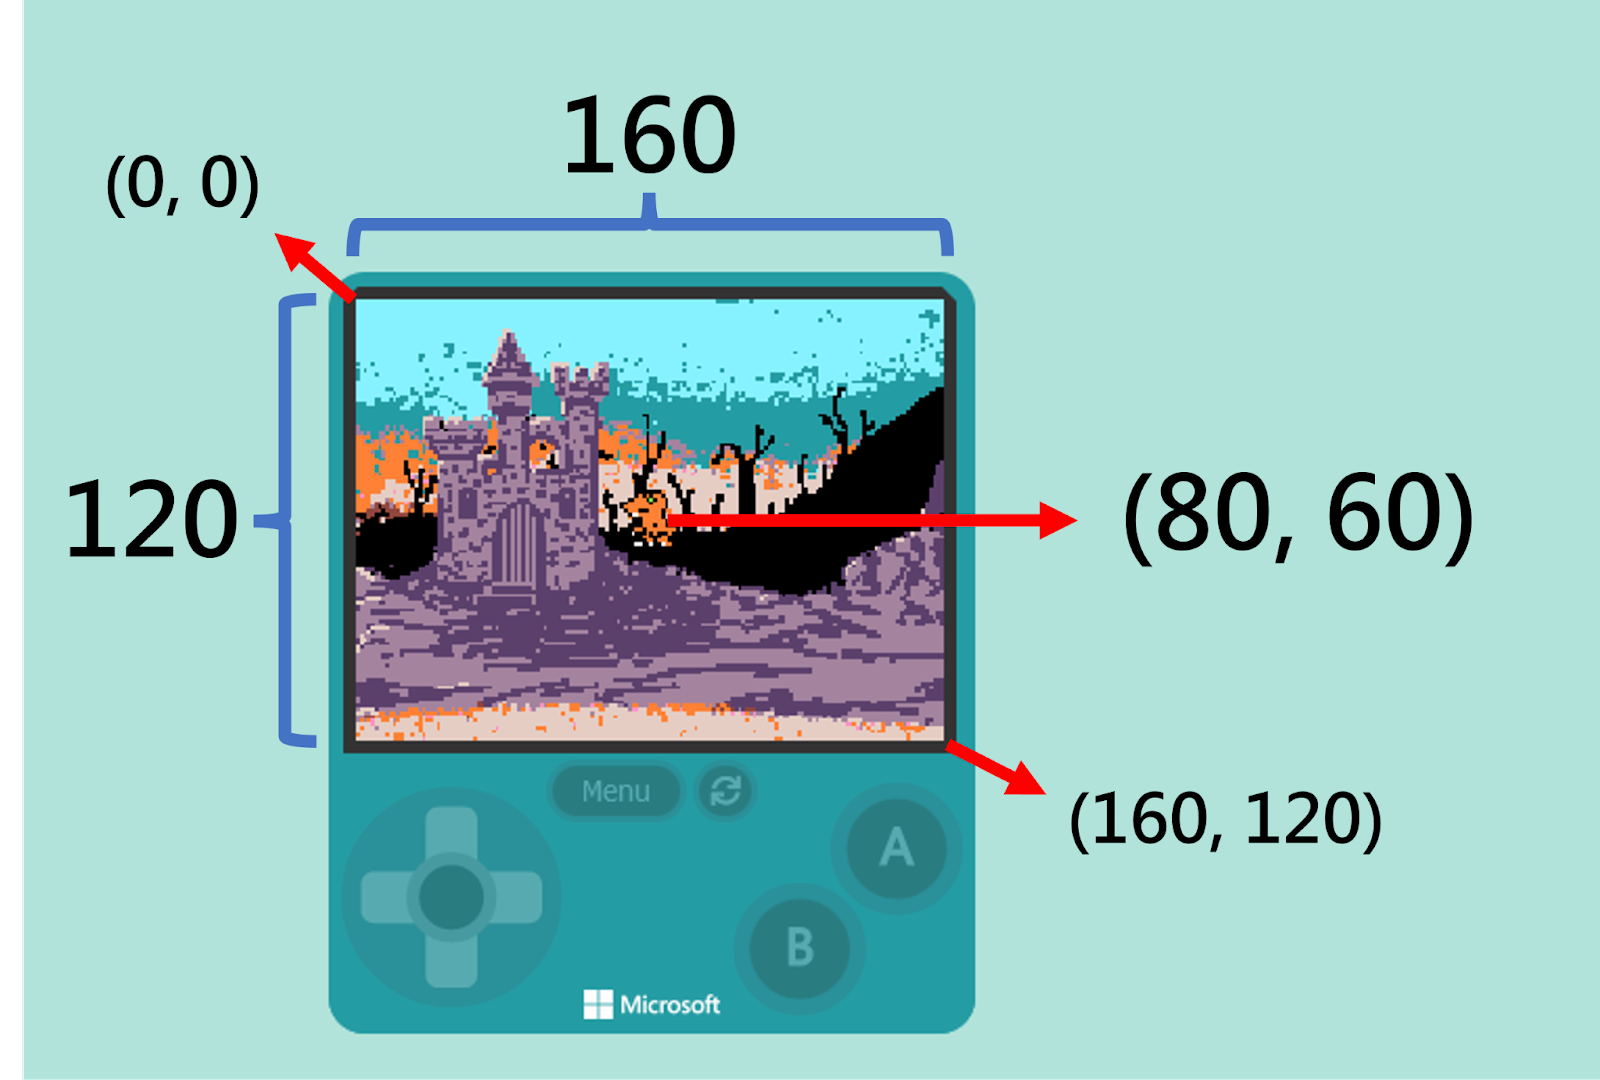
Let’s look at how big the game screen is and how the coordinates are configured.
The screen size is 160 x 120 pixels. The top-left corner coordinate is (0, 0), and the bottom-right corner is (160, 120). This means our orange dinosaur is currently at the center coordinate (80, 60).
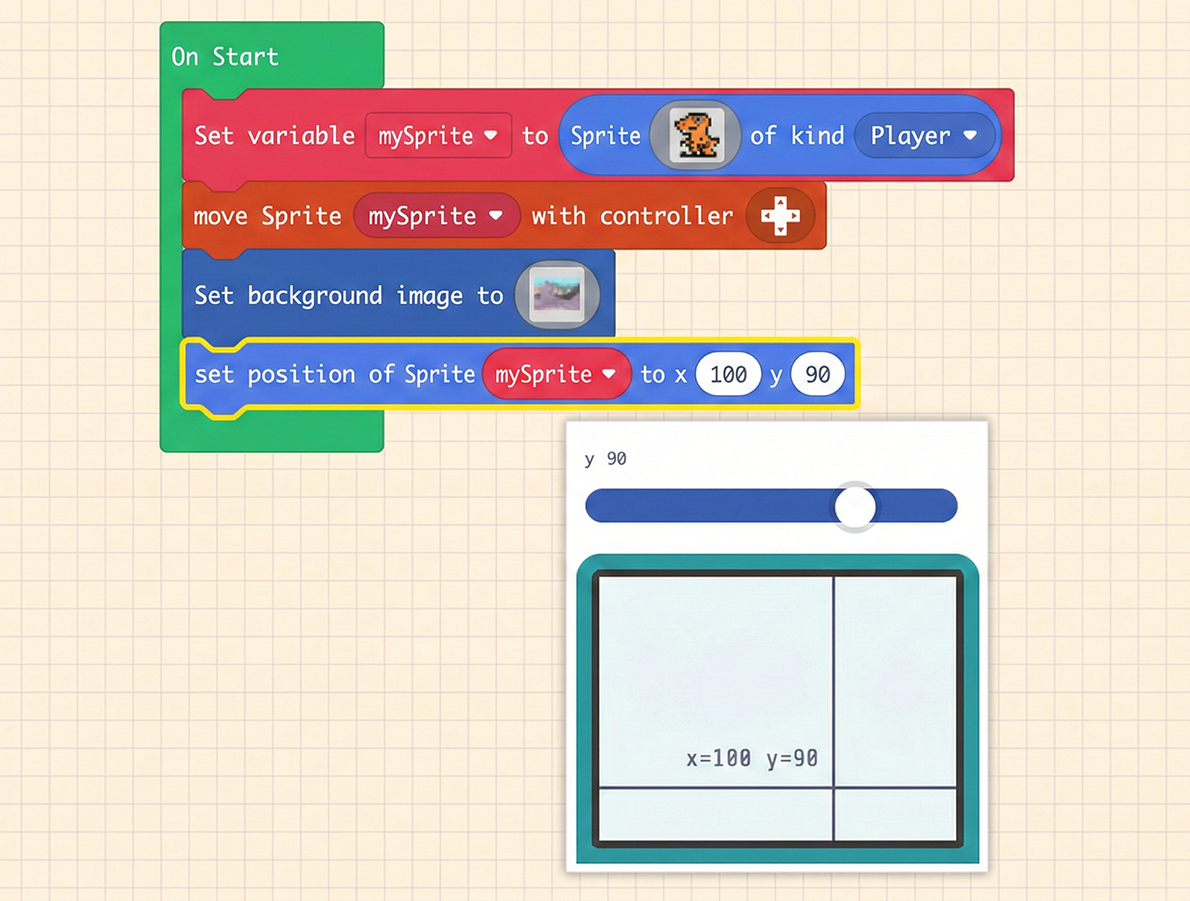
Once we understand the coordinate configuration, we can find the “set [mySprite] position to x ( 0 ) y ( 0 )” block under the “Sprites” category in the Block Toolbox.

Using this block helps us adjust the Sprite’s position. We can enter numbers in the x and y coordinate fields, or use the pop-up slider to adjust the position. The pop-up window is very user-friendly, providing a visual representation of the coordinates for reference.
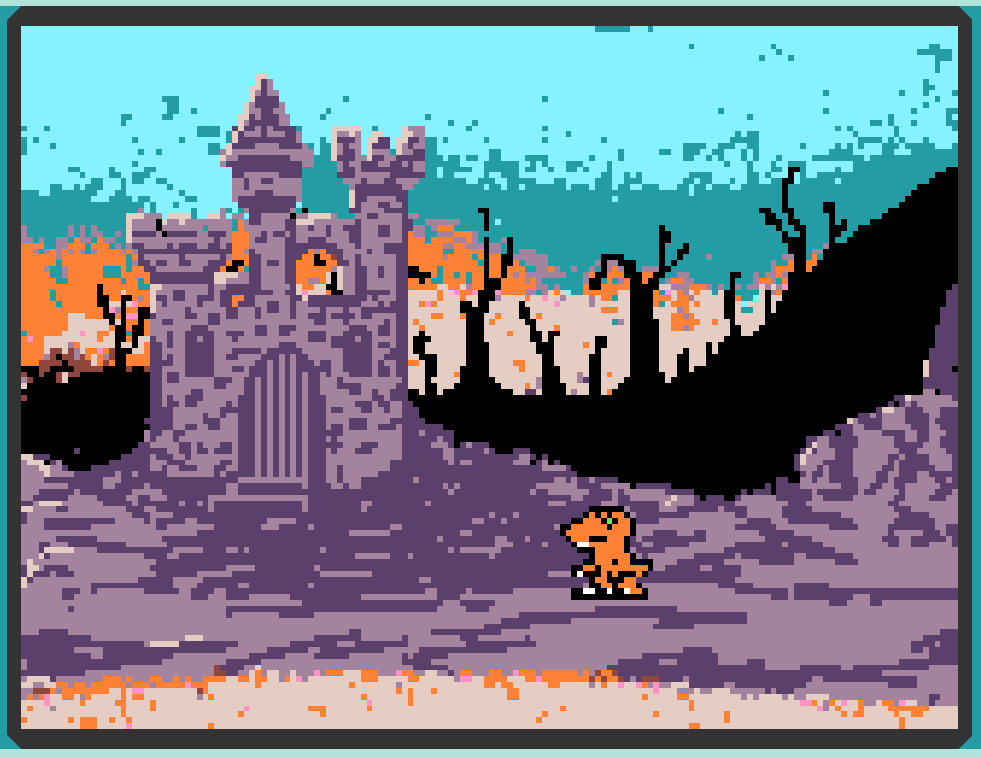
After adjustment, the scene looks much more reasonable. The orange dinosaur is now standing on the ground instead of floating in the air, as shown below.
6.2 Adding Game Level Sound Effects
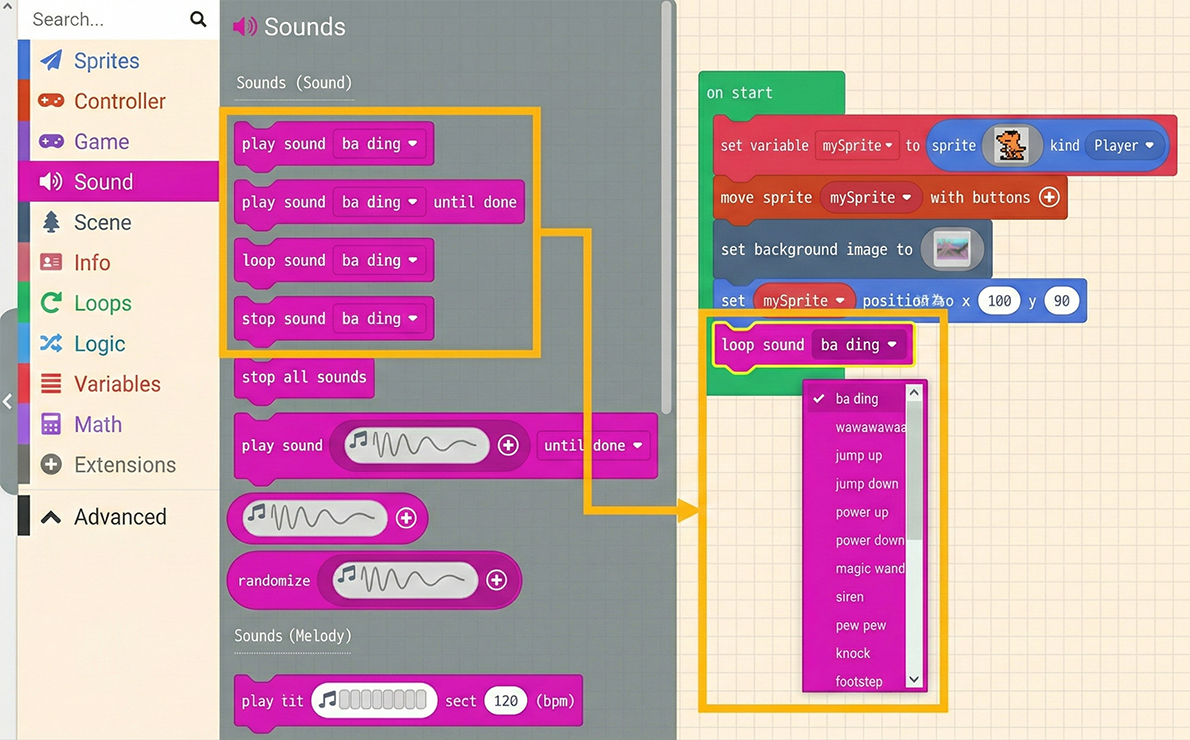
With a cool background in place, let’s try adding sound effects. In the Block Toolbox, there is a “Music” category. Besides the preset sound blocks, you can also customize your own sounds.
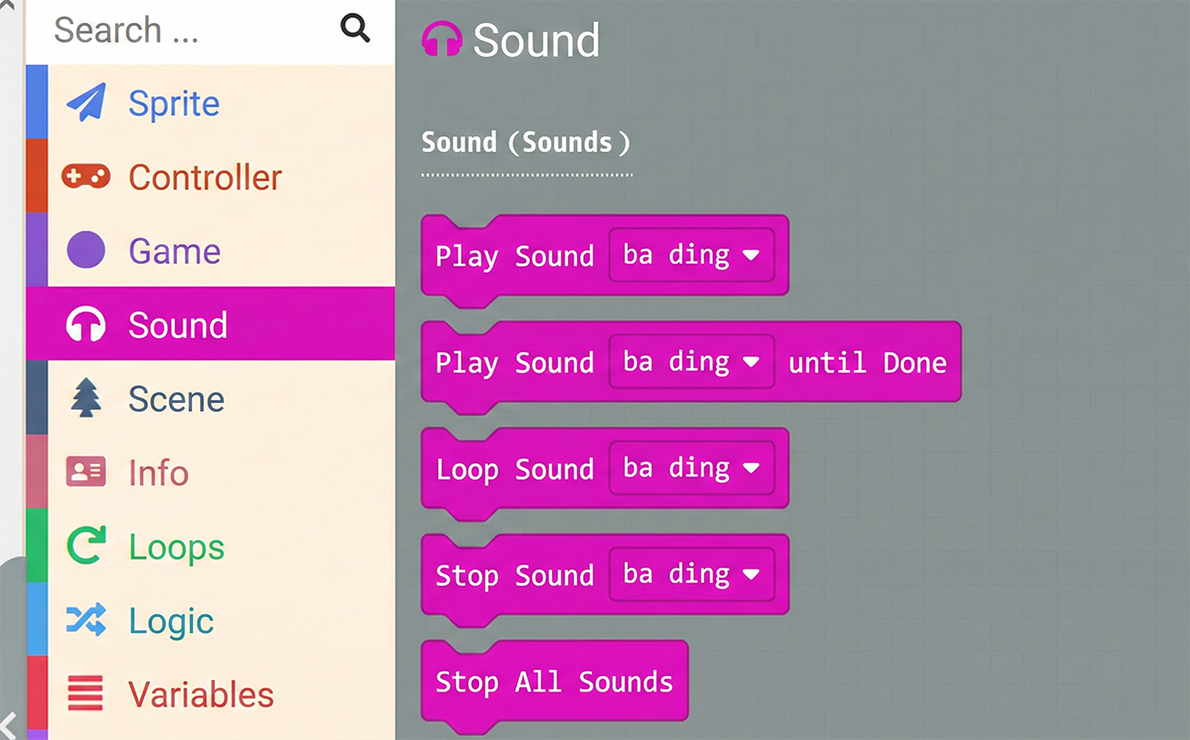
Regarding built-in sounds, feel free to experiment with them. They are mainly divided into three playback modes: “Play” (trigger and play from start), “Play until done” (wait until finished before proceeding), and “Looping” (play continuously).
Here, we will teach you how to compose your own music. After all, the number of preset sounds is limited and might not meet everyone’s needs. There are two common blocks to help you create music, as shown below:
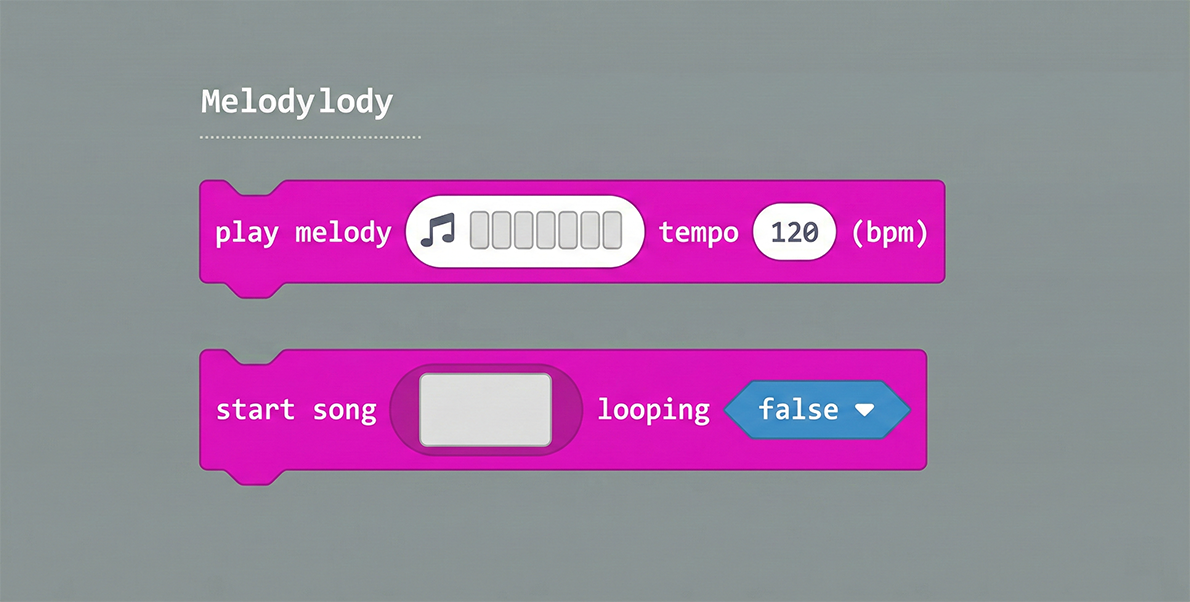
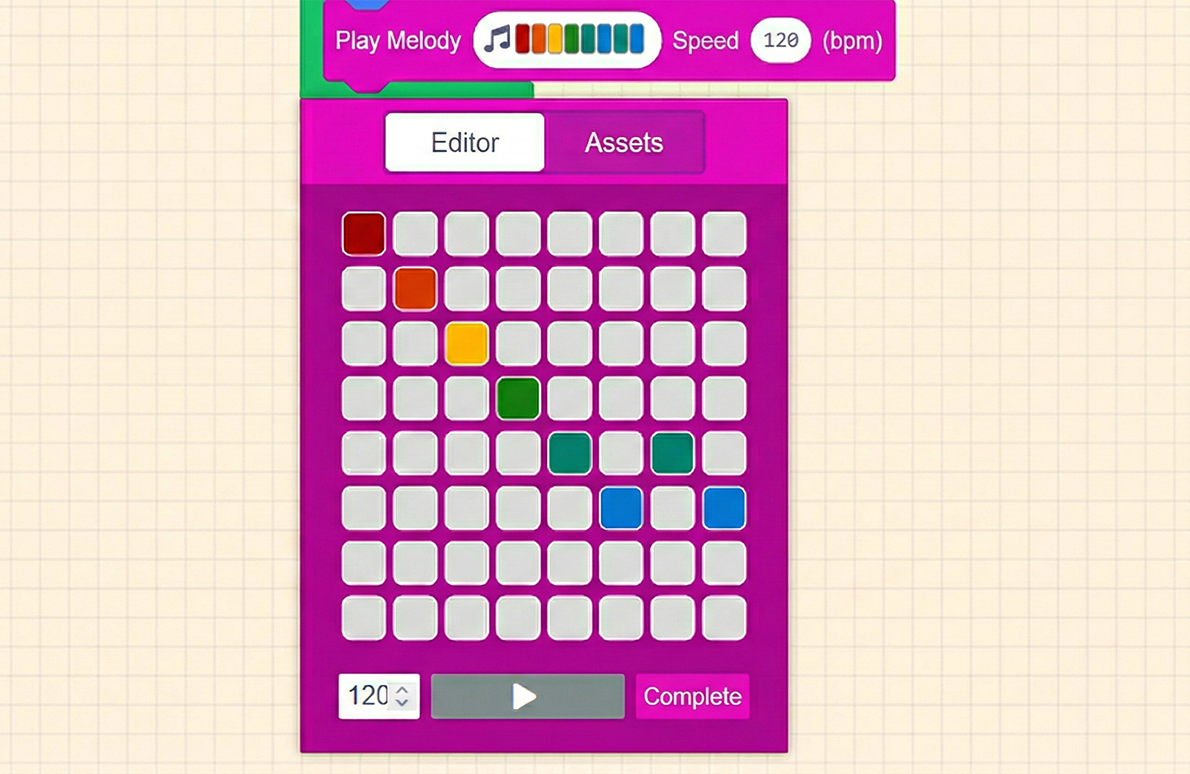
First, let’s explain the “play melody…” block. The first field allows you to compose the “Melody,” and the second field sets the “Tempo” (bpm). The pop-up editor is very user-friendly; simply click on the grid to compose a melody. There is also a Gallery to choose from, and a play button at the bottom to listen to your creation.
How is it? Isn’t it fun?
However, this melody block has a drawback: it doesn’t have a built-in function to repeat in the background. Once composed, it can only be used as a standard sound effect, which is a pity.
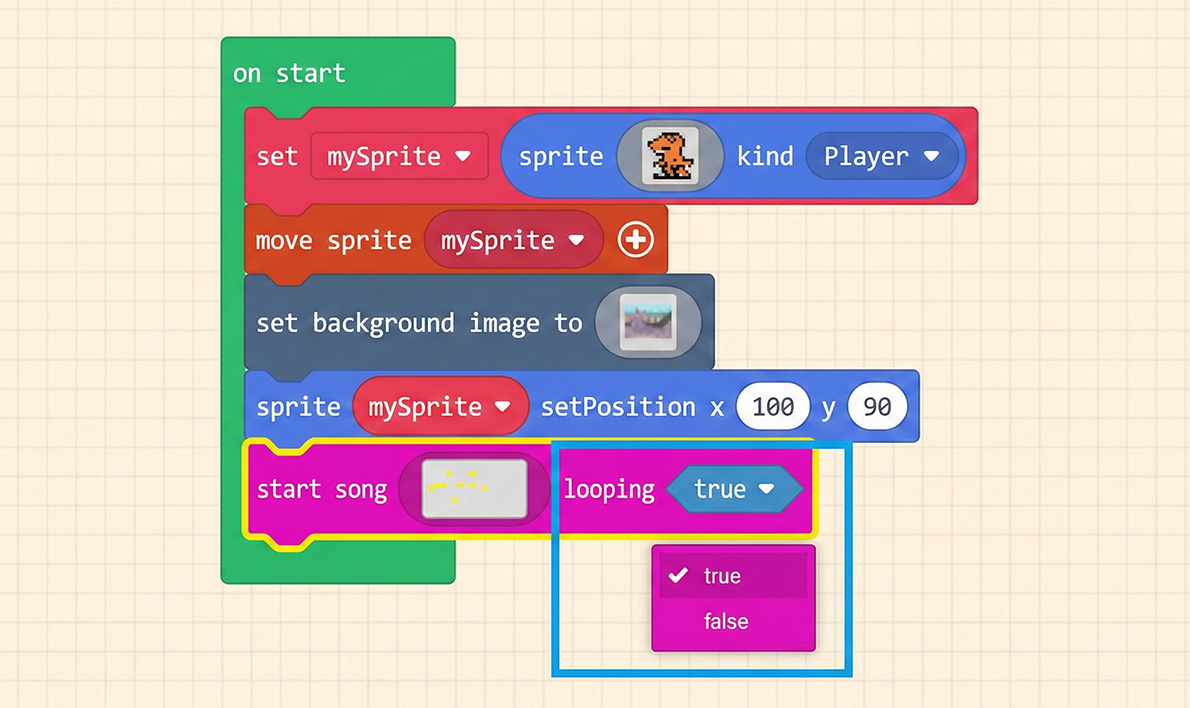
This is where the second block, “start song…” (or play song), comes in. This block includes a background looping function, allowing you to toggle whether it plays on a loop.
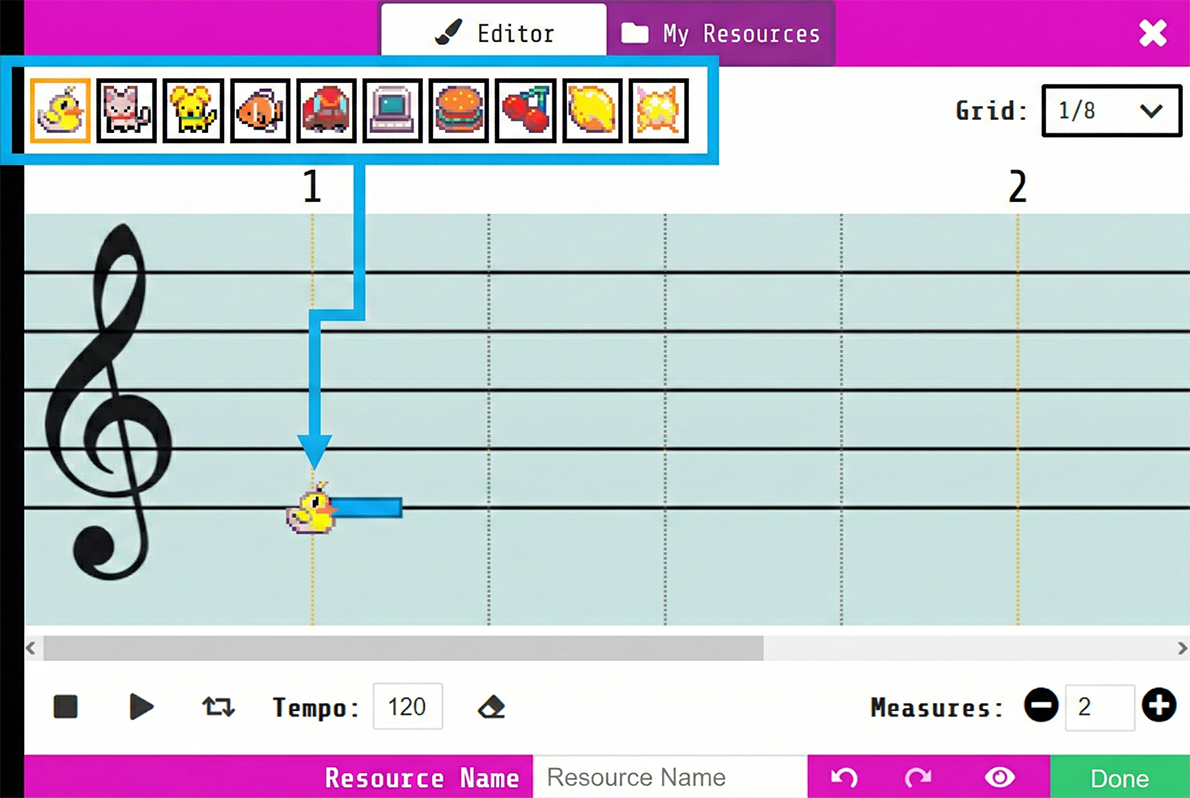
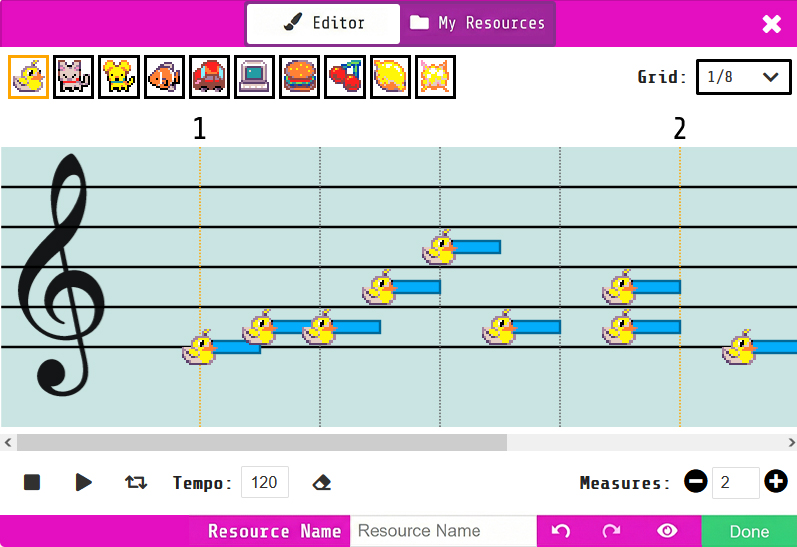
Similarly, click on the first setting option of the block. It also has a convenient editor, but it doesn’t have a ready-made Gallery to use. The sounds are similar to synthesizer effects. Usage: Select a “Sound Option” from the top row (e.g., the Duck icon), and left-click on the “Staff” below at the position where you want the sound to play.
If you want a more standard tone, you can choose the Dog icon (third from the left). The Duck is very suitable for a spooky atmosphere, fitting perfectly with the background we just set.
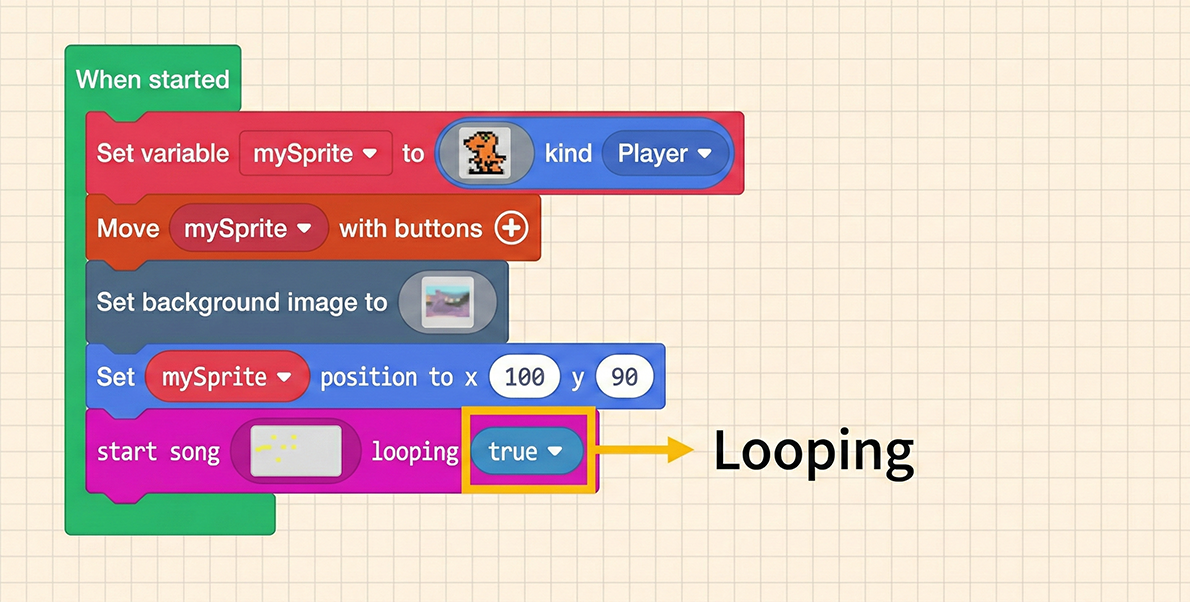
After setting up your background music, don’t forget to set “looping” to “true” (check the box) in the block settings so the sound effect plays continuously!